Expanding Shed


|
|
I've had a roof extension from my 9ft x 9ft shed for many years, build from reclaimed pallets of 2x6.
Now I have permission to fill in the sides, and after thought decided it would be jolly clever to box it all up in deep winter, but open it out in the good weather. So here are the frames for 4 folding doors that span the front opening, about 3.65m/12ft: 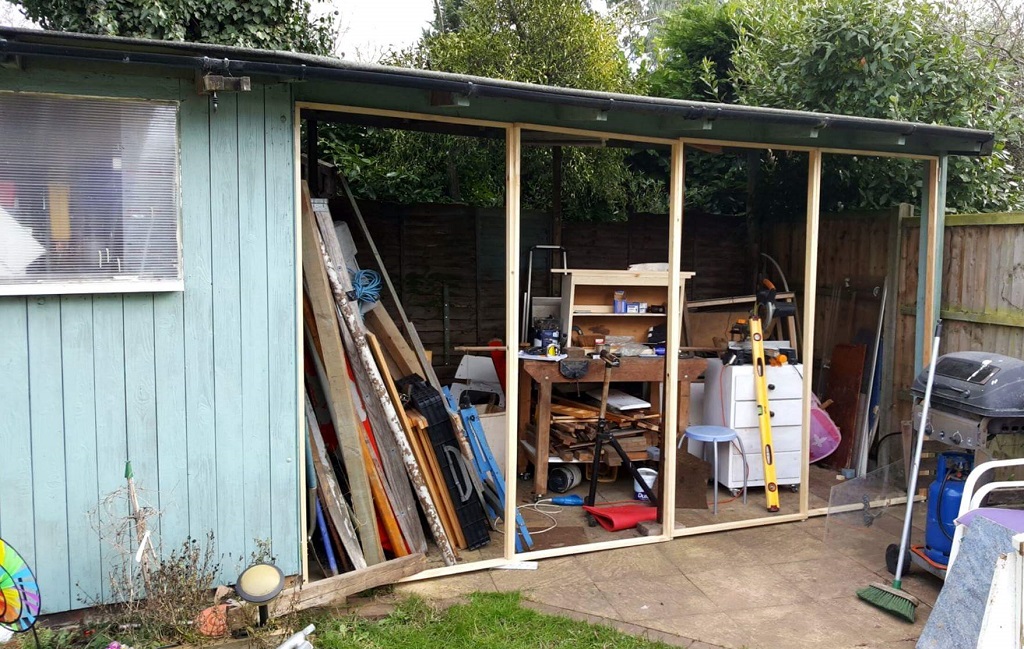 What a mess. Alternatively what a great collection of wood. The 4 drawers and workbench have been put on braked nylon casters, to re-arrange the internal space as required. The outer frames are 960mm wide, the inner frames just under 900mm, which means they can open and fold back each side: 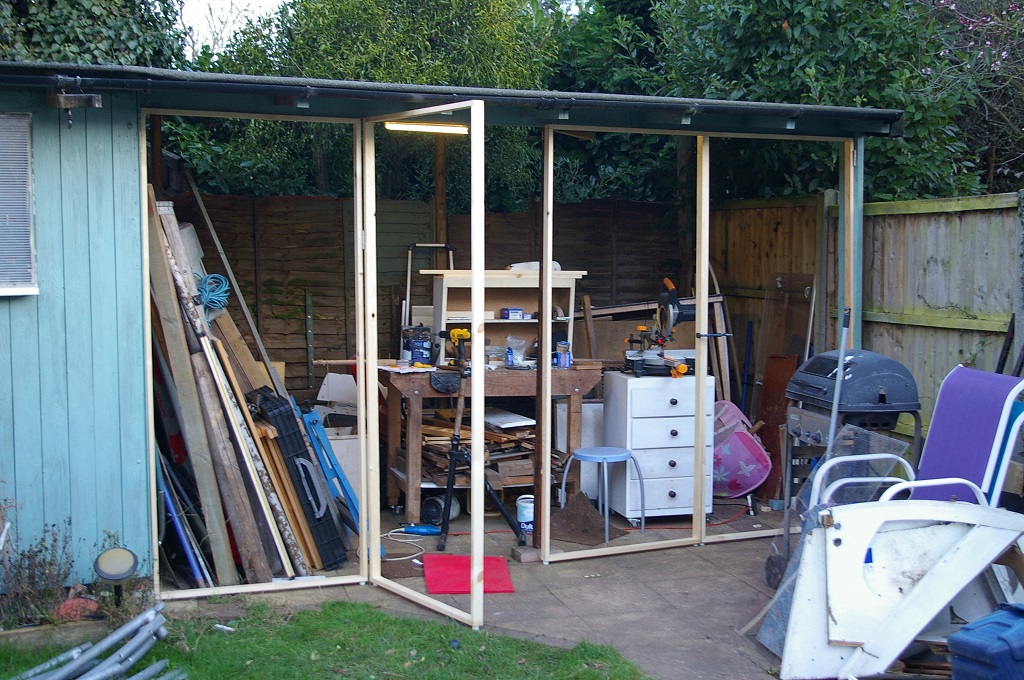 then: 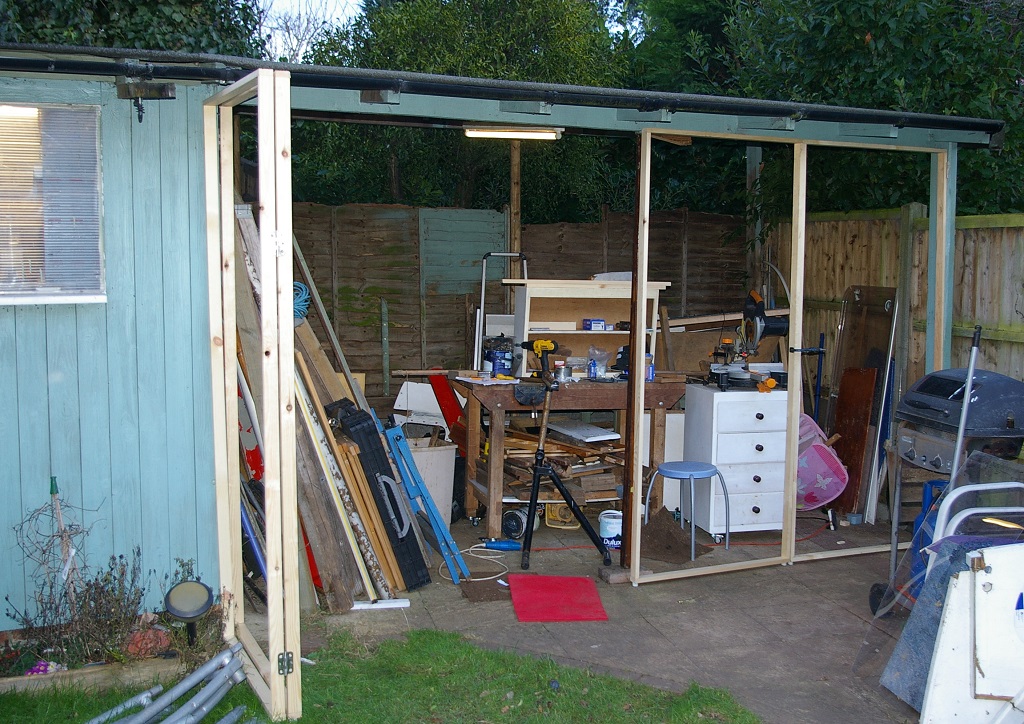 Clever innit? Dilys mentioned they don't keep out much weather at the moment! -Paul |
|
|
This post was updated on .
Looking good.
What you going to fill the doors in with? Given that Dilys does have a point! Worth considering twin wall polycarbonate (the roofing stuff.) Just used a it for a door in France and it's nice and light (weight wise) and light (as in transmission of daylight) and cheaper than many alternatives. Not sure how secure it would be, but it's hard to make doors such as you're building secure against any serious attack. Kate commented that the extended workshop area looks full already. Then she admitted that, if your household is like ours, it was probably due to the rest of the family dumping stuff there, not you. Look forward to seeing the doors fully weatherproof. Tim. > On 24 Feb 2017, at 23:32, Paul (admin) [via UK HBBR Forum] <ml-node+s967333n4029932h5@n3.nabble.com> wrote: > > I've had a roof extension from my 9ft x 9ft shed for many years, build from reclaimed pallets of 2x6. > > Now I have permission to fill in the sides, and after thought decided it would be jolly clever to box it all up in deep winter, but open it out in the good weather. > > So here are the frames for 4 folding doors that span the front opening, about 3.65m/12ft: |
|
|
Timmo,
We fitted Grade A windows and door to our house - it's noticeably warmer. I now have 8 spare sheets of clear secondary glazing, acrylic 960 mm x 550 mm. The plan is to fit the acrylic sheets at the top of each door, then fill below with plywood, insulate with 50mm glass fibre then plywood on the inside. That should be enough light, and the panels will be painted to match the shed. Hanging plants can break up the plywood and soften the look. I could add the other 4 acrylic sheets to make double glazing, but insulating the roof and walls is more important. I'll make 50mm insulated panels for the walls, using 2x1 and 6mm ply. I lost the battle of our interior garage turned into a dining room when the kids were young! Now they have 66% fled the nest I started to take over the 'dining room' with all my tools - tantalisingly about 6 feet from MilliBee on the drive. Plans of fitting French Doors to quickly move between boat and tools whizzed through my head. Then along came Xmas and a stealth campaign by Dilys and Liza to clear out the room (which also had a lot of craft junk in it). Ta Da...a clear room for nice Xmas meals with our extended family, which now totals 7. Then we hosted Granddad's 90th birthday, a total of 22 people. Game over. The net result is a Tsunami wave of tools and wood that washed up at the end of the garden. It looks full but there is a lot of space behind that I cleared to work on the rotting fence panels. When it is finished I can store the wood flat on long thin shelves which will clear a lot of floor space. The total space is approx 21ft by 9ft, so a long slim river thing, or long spars can be built in the dry. If the sun shines the 4 doors open to a massive space! Paul |
|
|
This post was updated on .
Chris W. wanted a birds eye view, aka drone view, to get the 'big picture'. Here we go:
Drone View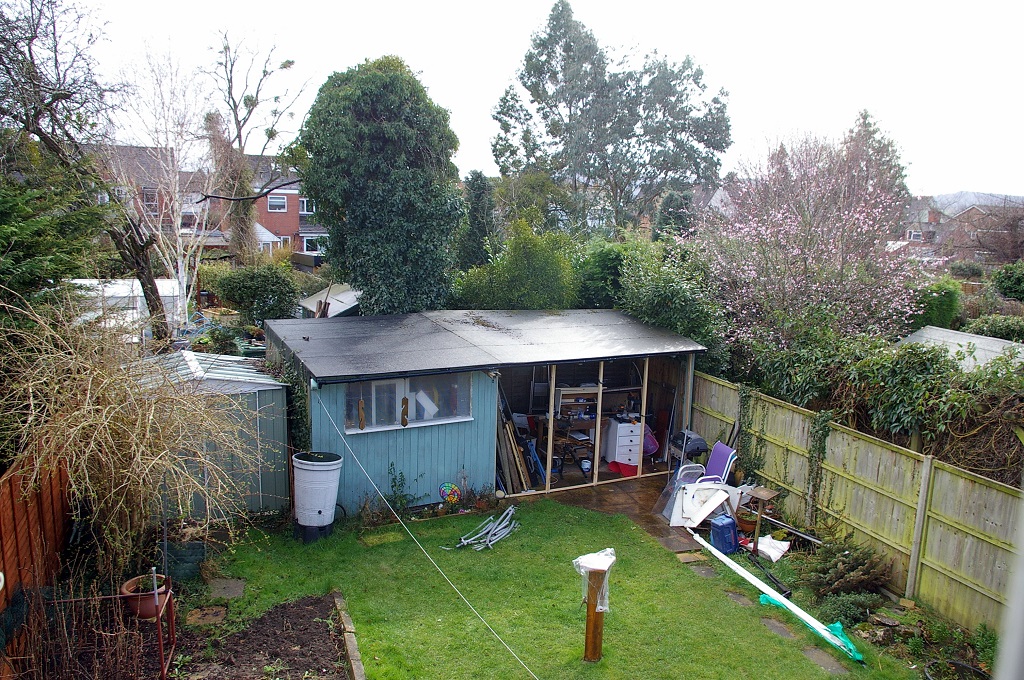 Framed View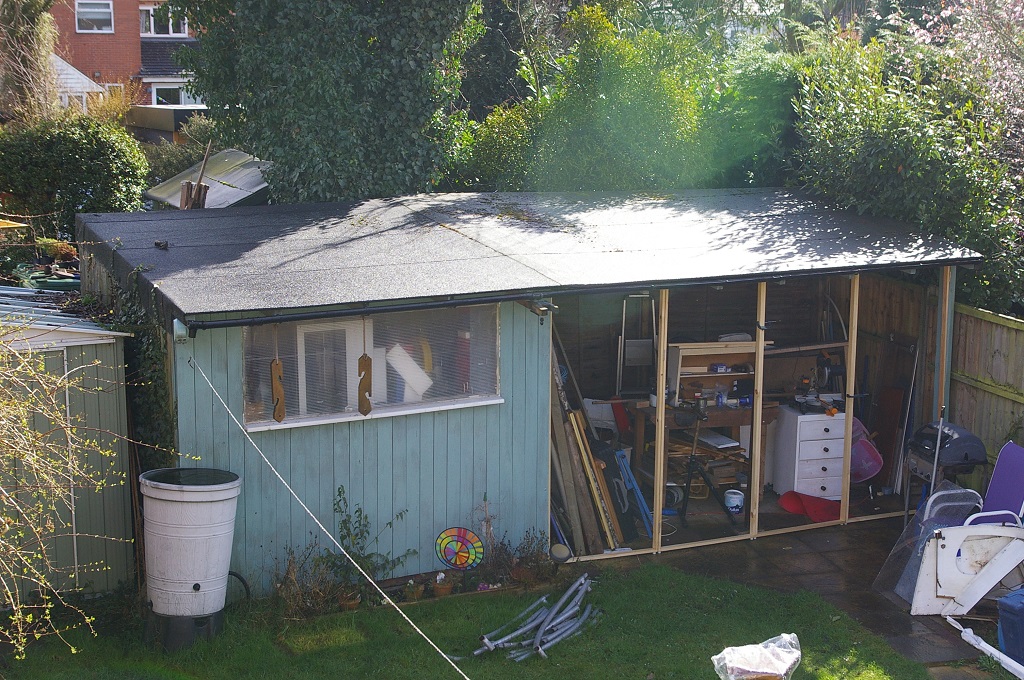 It's about 21ft wide (wider than a double garage he he) and 9ft deep on the shed Port side. Notice that the extension roof is 1ft deeper then the shed in the middle, tapering down to about 9ft (the garden boundary is crooked). No I don't have a drone, I took the pics from a bedroom. But a drone that could automatically follow our boats might be fun! -Paul |
|
|
Only problem with drones is their fly time.
Son Michael's video production business now has a drone. But fly time is only a few minutes (thogh it's not a huge one.) First job they used it for was filming a speed boat at sea off the East coast. They had to do some nifty boat handling in the chase boat as well as careful flying to make sure they were there to catch it before it ran flat and dumped itself in the sea. Needs a whole stack of charged batteries ready at the start of each shoot. Get's some spectacular shots though. God pictures of expanding shed... got the whole clearer in my head now. Tim.
|


|
|
On 27 Feb 2017 at 7:04, Timmo [via UK HBBR Forum] wrote:
> > Only problem with drones is their fly time. > Not the only problem. A few months ago I caught a bit on the TV where someone was testing drones that were automatically filming him on his mountain bike. In the bit I saw he seemed to be spending most of his time extracting bits of drone from the trees. -- Sail when you can, row when you must, motor only when you have to be at work in the morning. Alastair Law Yeovil, England. <http://www.little.jim.freeuk.com> |
|
|
I've seen similar situations, though I'm not sure of the legality. Michael and his business partner have had to go on courses, write extensive operating manuals and pass exams before being allowed to use their drone commercially and I doubt 'just letting it follow me around' would be regarded as an acceptable operating procedure by the those authorities even though that facility is now built into some of the drones.
Sounds like it's self policing though. The drone destroys itself. Hopefully on inanimate objects.
|
|
|
It was on the gadget show. They very unfairly but hilariously made the drone follow the cyclist along a path through the woods. It should work a lot better following boats down the Thames, at least on the broader reaches...
|
|
|
In reply to this post by Timmo
Here's how I plan to fit the windows on each door, using the spare acrylic sheets.
1) The ply will be glued flush with the horizontal frame, positioned for a generous overlap for the window. 2) The stainless hinges are fixed to a stronger part of the frame. If the hinges were right at the top the acrylic would take a lot of the hanging weight. Not shown here, a middle hinge will distribute the loads through the plywood panels and away from the window. 3) Its important the centre of the hinge is at least 6mm from the panel. Then when opened 180 degrees, folded back, panels of 6mm thickness will not collide with each other. This one needs to move out a tad, and I could not resist the Apollo style reflective shot of our solar panels. 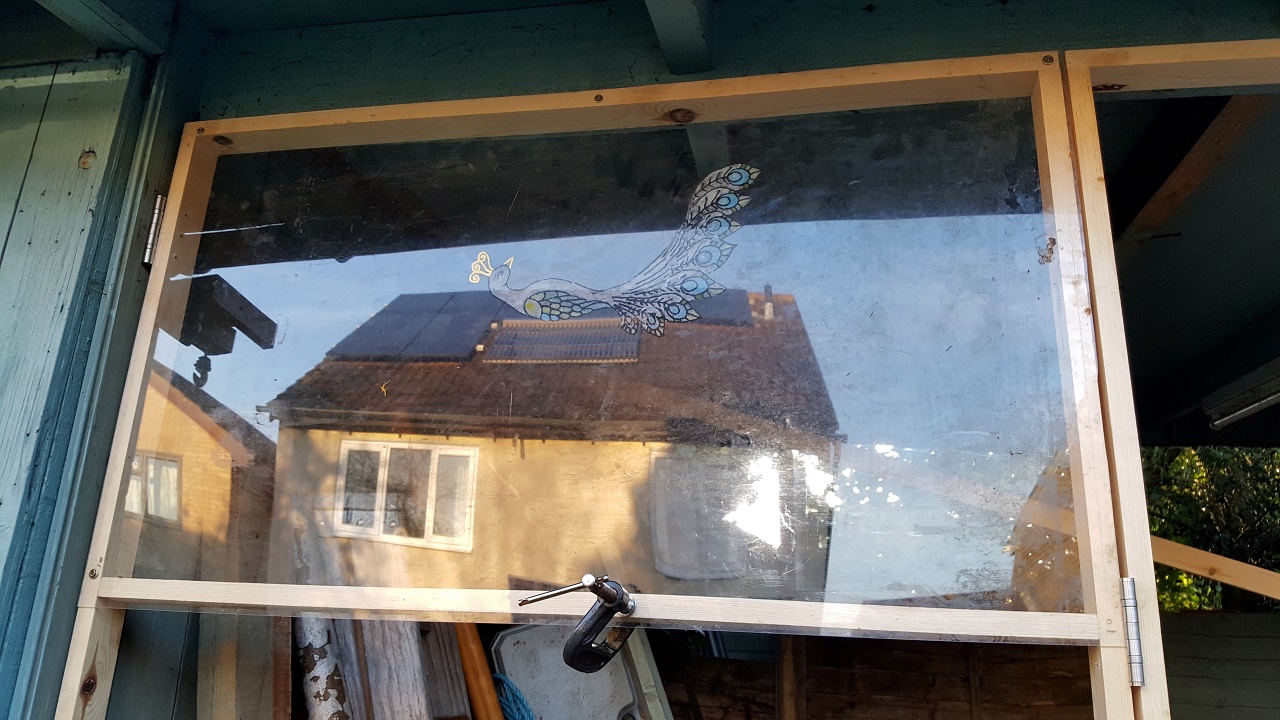 The Boat ProjectOne idea is to use up scrap ply, in patchwork similar to The Boat Project. People donated pieces of wood for the hull of a community project: The Boat Project. I have lot of scrap ply that is wider than the door, so multiple offcuts could be glued together for a decorative effect. -Paul |
|
|
Planking TimeHere the two outer doors are planked first, glued with a modern D4 waterproof, solvent free glue. It's thinner than PVA, grabs very well but runs easily if you apply too much. The key is to clamp the joint well. I had two failures on T joints where a single panel pin held the joint together - not enough pressure I expect. Unlike epoxy it is not a gap filler. I clamped the 6mm ply with loads of 3.5 x 30mm screws, that's my quick and easy way to get a good joint on MilliBee's foredeck and laminated cabin roof. It's a good technique if painting, as all the screws holes will be filled and disappear. Insulation GapThe planed 2x1 will snugly trap 50mm fibre wool insulation along with another layer of 6mm ply on the inside. That's pretty much the lightest, strongest, cheapest, weather proof insulation layer I could imagine. 4mm ply would save weight but it's not strong enough for shed use.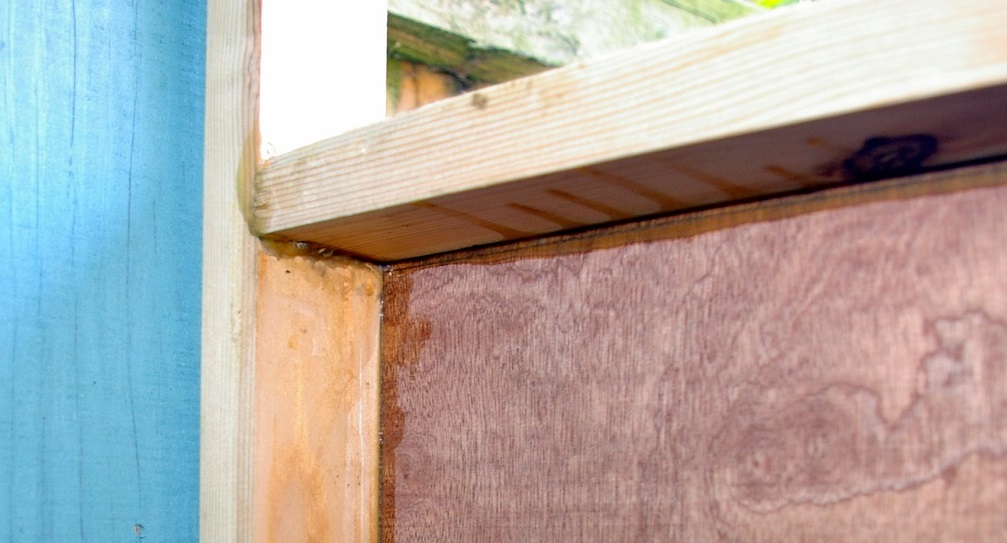 Early one morningTook this Sunday morning, after a heavy dew on everything in the garden. Even with no windows and gaps between the fence panels and roof at the side and back everything was dry inside. It took a long time to plane the ply flush with the frames, not to mention cutting them exactly to the right size for a tight fit in the middle.The doors are huge, the 1 metre ruler gives a sense of scale. 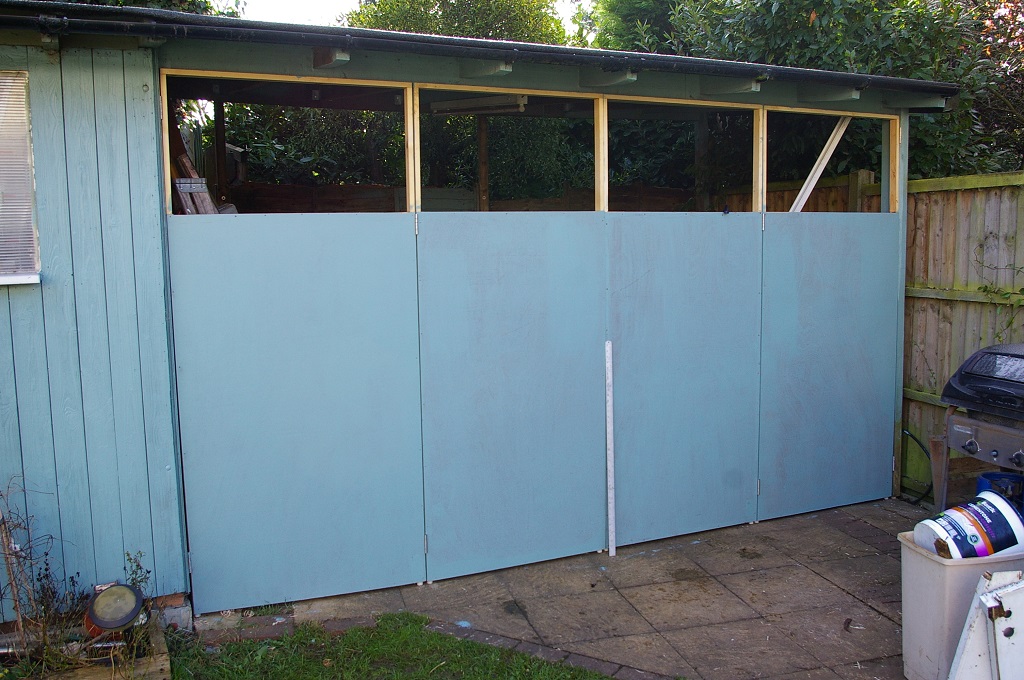 MondayWhat a glorious sunny day it was. Just right for building in the garden......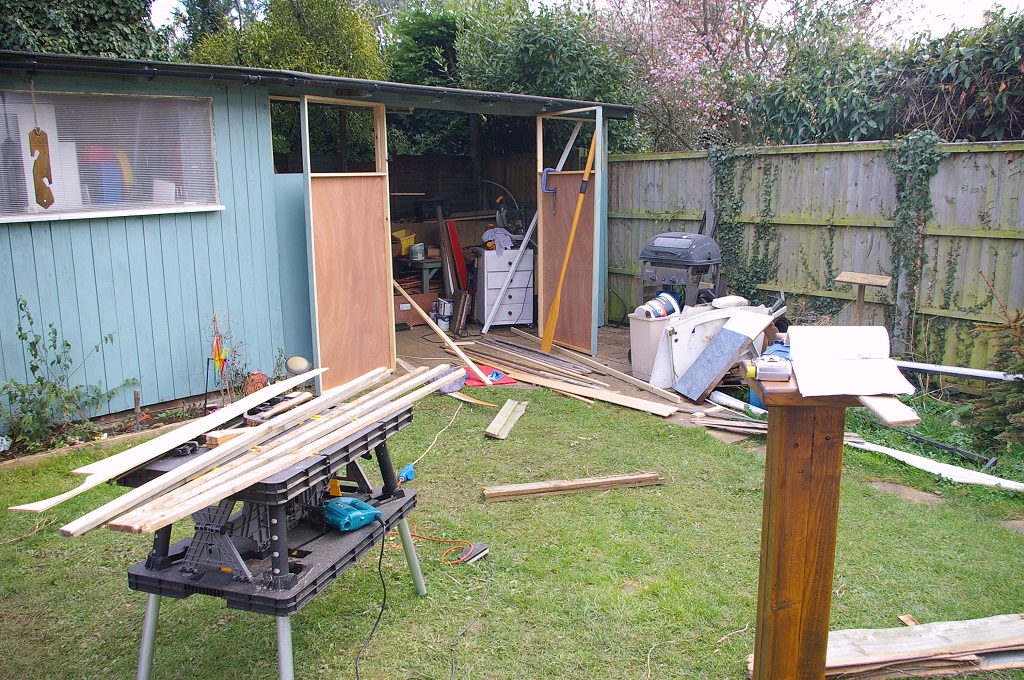 I was sorting through enough scrap wood to make a yuloh for MilliBee, similar to Al's yuloh that he made for Little Jim (both 14ft long). -Paul |
|
|
Inside by the left door I started to put up 6 storage bin panels. I have loads more bins and when labelled they are very good for quickly finding tools. This location caught the Westerly rain before I added the doors, so reclaiming the space for hand tools, screws, bolts, boat fittings, duct tape and WD-40 is organisational heaven.
 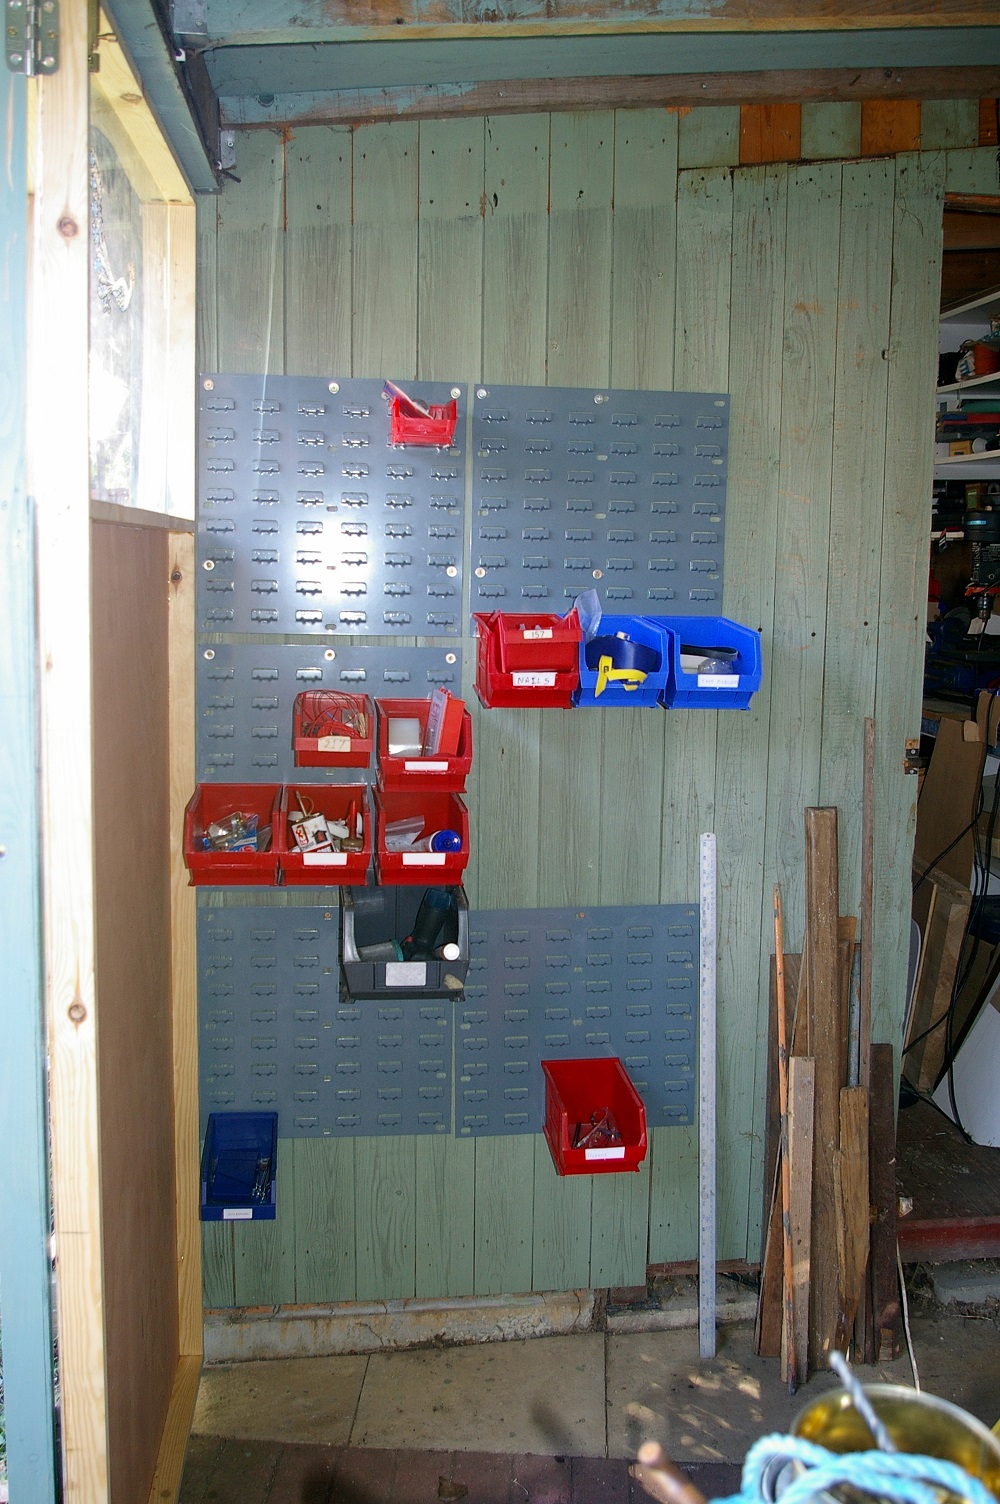 Top left you can see the stainless hinge - just 1 screw at the moment until everything hinges correctly. Also a brass offset bolt to lock the door into the top beam; for the inner door to open freely its essential the outer doors are locked in place. I'll also add floor bolts, drilling into the paving slabs. The 5 upright pieces of cladding are from the original shed 6ft x 9ft [built 1972 by in my step-grandfather]. I extended it to 9ft x 9ft and left those 5 pieces so they could become a second door. Together with the first door the max. opening is 50 in; CDubs Premise 15.5 river raid electric/row design would be about 27in wide at the door[s]. Bottom right you can see the 8in step into the old shed. I might add a ramp so that mobile toolstations can roll in and out of the shed for using or to provide space. The chop saw table is an obvious choice; everything will be on wheels or light enough to lift. cheers Paul |
«
Return to Builds in Progress
|
1 view|%1 views
| Free forum by Nabble | Edit this page |