Modernising a Heron
|
|
I love sailing my Heron "ElSa", she is fast and more stable than a Mirror.
The name is an anagram of my grandchildren's names Ellis and Sabriel. However, grandchild #3 is due in December, so expect a new boat name in 2024. The plan is: Rip out the annoying frames and floorboards. They are a great place to lose car keys - ask Graham. And bailing water through floorboards with a sponge is impossible. Install Mirror style seats 6ft long. Parallel to make sleeping platform easier. Location of hatches to be defined - frames were every 2ft. Install half-height bulkhead tank, sealed with access covers. Stowage mostly above, some in tank - paint it white inside. Replace any polyurethane joint that flexes with epoxy. Remove side deck supports completely. I carefully removed 28 nails each side, cleaned joints, epoxy and clamp every 6in. That significantly improved side deck strength. Remove king post, sand and epoxy to hob and king beam. Significantly stronger under mast. Rip off foredeck (with 2 halves it leaked anyway), remove king plank and sand. Sad, but necessary for access to build half height tank. Building our new kitchen and general health issues hasn't left much time for boat renovation. I'll do some very quick temporary work, but epoxy all the critical joints. |
|
|
This post was updated on .
Here is a mockup of the seats, done last year. The F5 bulkhead for rear seat/tank is taken from Paul Fishers stitch and tape Heron plans.
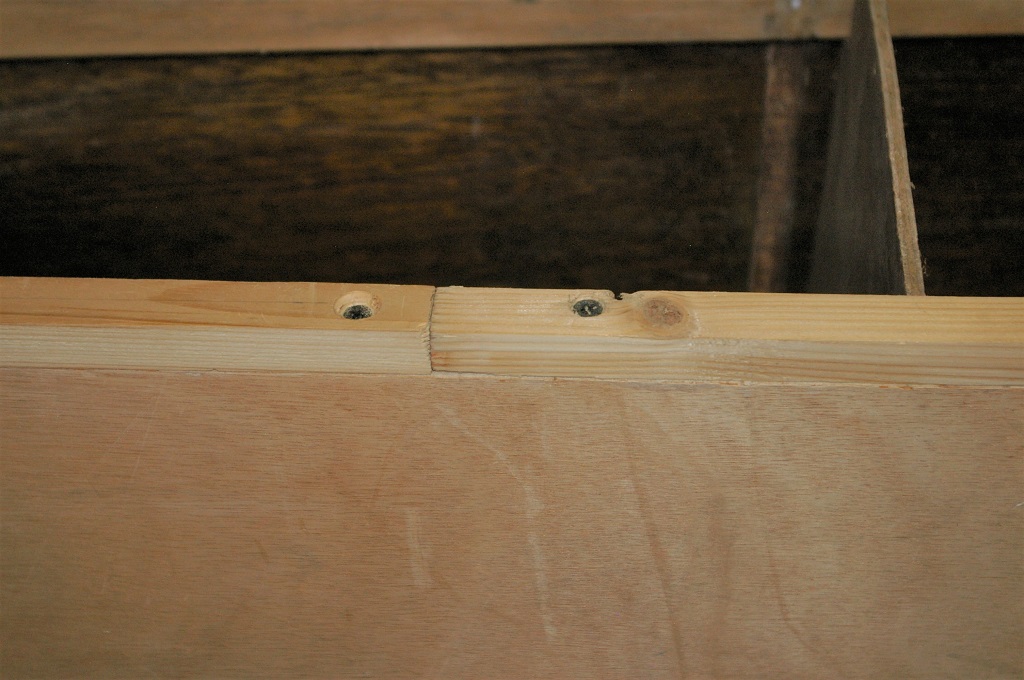
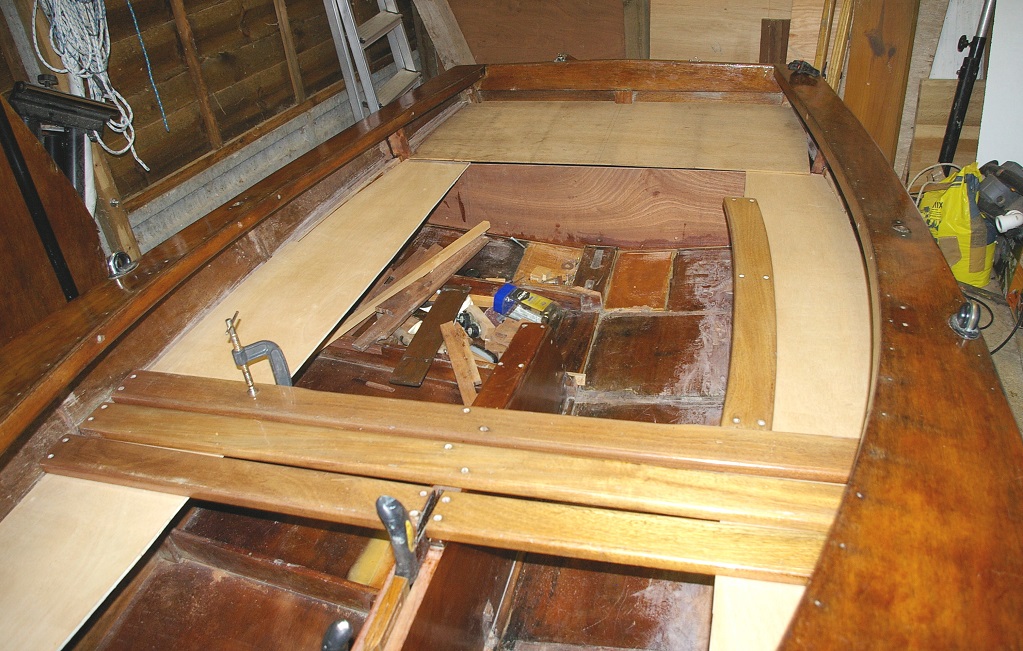 A fairly generic layout. Can you see small dots along the side deck inner edges? They are the nails that I systematically removed later, then epoxied the ply decks onto the curve supports of 40x15 Red Mahogany (thanks Richard for species ID). I won't be using all the old seating - nice pieces of Mahogany but heavy, about 10% of the hull weight. I'll chop down the CB thwart supports to the side seats. The side seats are set parallel to waterline, for sleep aboard and to match Paul Fisher's S&T Heron plans. The old seating curves higher towards the transom, so an awkward adjustment has to be made as the side frames also curve up. Pictures later. Due to a cockup the seat uprights were epoxied 15mm low  . I quickly produced lengths of 15mm softwood on my planer thicknesser and screwed them in place: . I quickly produced lengths of 15mm softwood on my planer thicknesser and screwed them in place:
 |
|
|
This post was updated on .
Here is a general view of the half height bulkhead, taken from Paul Fisher's plan. The king post (mast post) is epoxied to the bulkhead and the king beam.
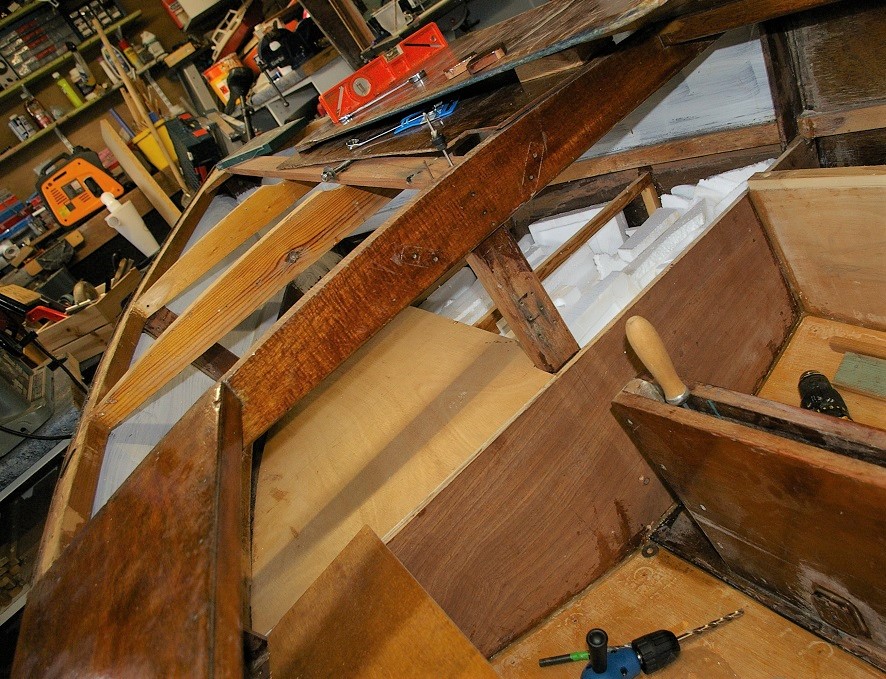 At top right you can just see a section of frame that was removed, sanded and trimmed to fit from the king beam, down the hull to the bulkhead rear. So that whole area is very solid - it takes mast compression forces and chainplate forces are nearby. The side decks, now epoxied, make the area between chainplate and king beam strong. I didn't bother with the deck outwhale joints, a previous owner may have reglued them and they are strong. What I did bother with was the rear quarter joints, which flexed under hand pressure. Careful use of a 25tpi metal saw blade cuts into the polyurethane glue, which also cracks easily. After that heavy grit Aluminium Oxide sand paper cleans out the joint and widens it enough to drizzle in slightly thickened epoxy - I did that before I glued the side decks which further strengthen the rear quarters: 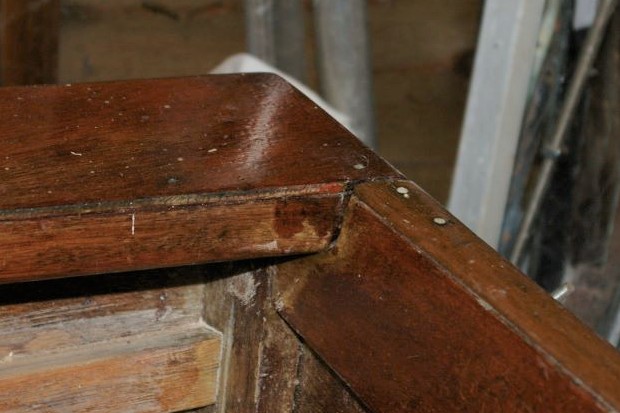 You can't rebuild the whole boat which is held together with nails, screws and a prayer. But you can choose the battles you can win, by improving joints that don't pass my "thump test". I thump them and if something rattles or moves they fail. A recent weak spot I found was at the transom centre. A buttress supports a vertical cleat, screwed from hog and transom - that's fine. The cleat butts up against the transom cross piece, the butt joint cracked and the transom flexes slightly. I cut into the joint with hacksaw blade and cleaned it out with heavy grit sand paper. My Bosch oscillating tool fitted with a sanding pad strips into varnish very well. I've planed up 20mm hard wood to overlap the joint: 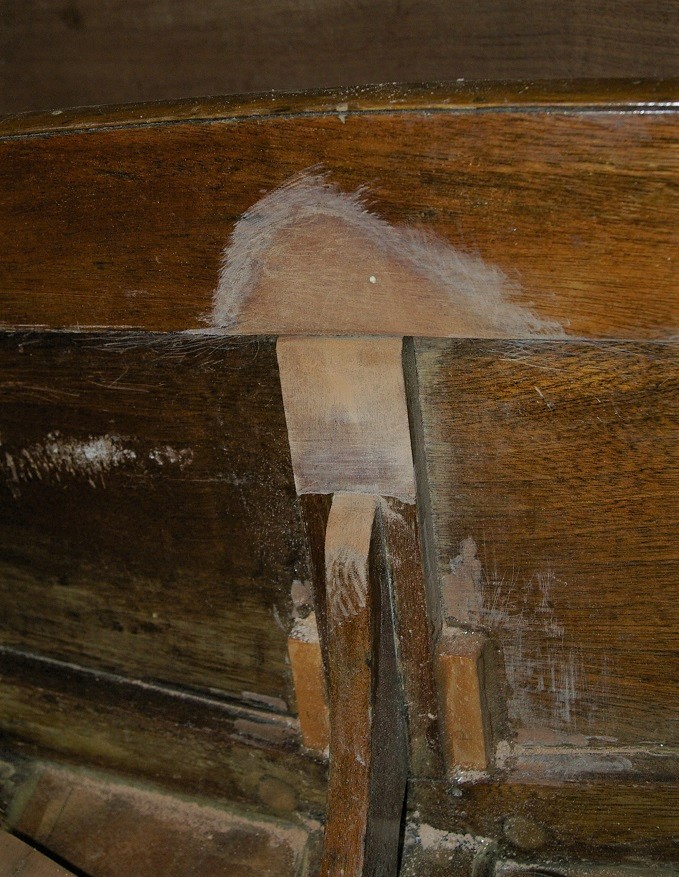 The rear seating/tank top will lie just above the buttress, so the whole area between bulkhead F5 and transom will get stronger. You can see the F5 bulkhead in earlier pictures. |
«
Return to General Discussion
|
1 view|%1 views
| Free forum by Nabble | Edit this page |

