A Duck Punt for the Cordless Canoe Challenge
123
123
|
|
No more photos, yet, but Quackers the Duck Punt is now glassed inside as well as out, so only needs the minimalist interior bits fitted, like a mast step and thwart, a small foredeck/buoyancy chamber and the pin rails. It's come out heavy, I know, as I've used way too much resin. The roll of glass cloth I happened to have to hand is 300 g/m², but it's rovings, rather than plain weave, so it takes far too much resin to wet out. I'm guessing that there may be more than 4 kg or so of resin on the hull now, together with maybe 3 kg of glass and around 2 kg of foam, but by the time I've added the interior bits, paint and maybe some strips around the gunwales I reckon I'll be struggling to hit my 12 kg target weight. If it's not too windy tomorrow I should be able to upend the hull on a set of scales and see how it's looking, weight-wise.
|
|
|
Rain and the high humidity has stopped work on the hull, so I've been getting on with the drive leg. I encapsulated the universal joint right angle drive inside a faired leg that fits to the pivot that I made for last years CCC.
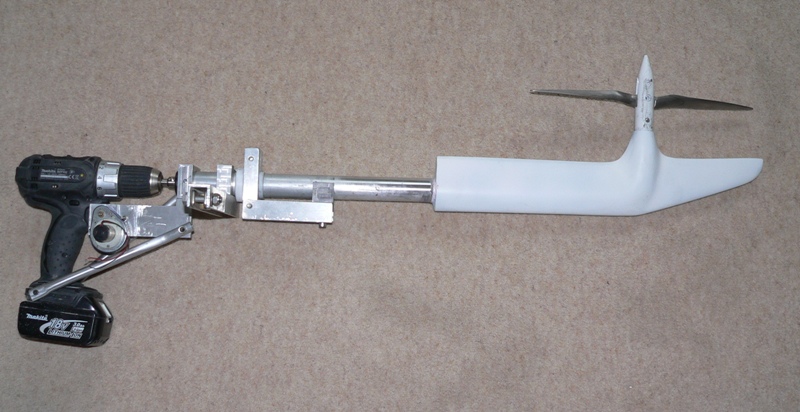 To work the drill trigger remotely (I'll need to be well forward of the drive unit to keep the boat balanced) I came up with this geared motor that just rotates a cam on to the trigger: 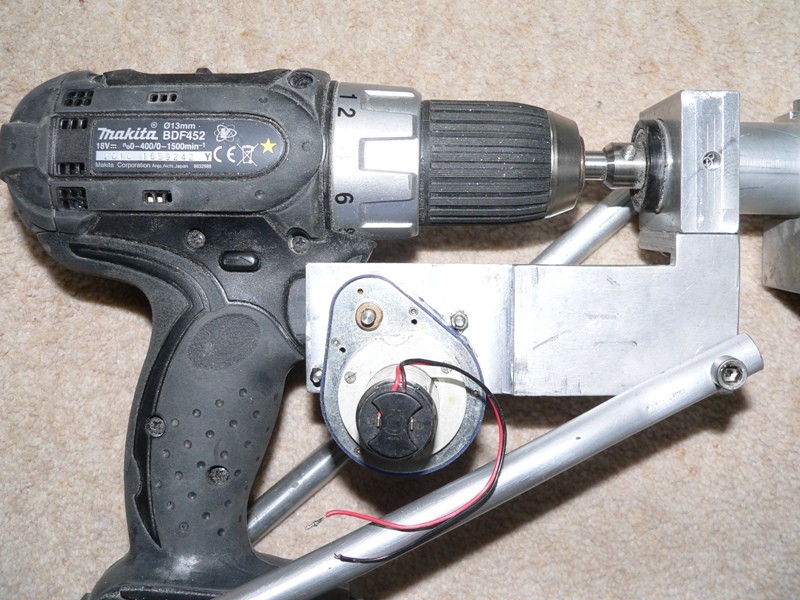 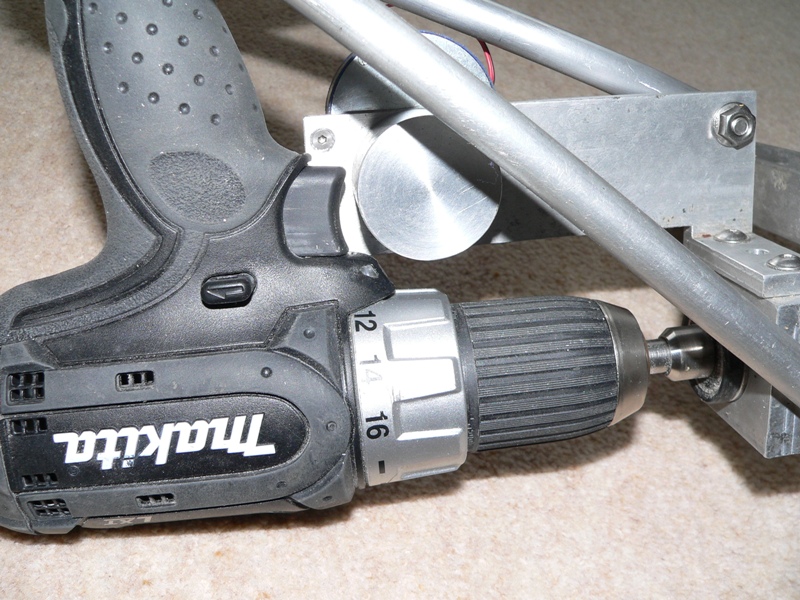 When run from two AA cells it motors nicely on to the trigger and provides a reasonably sensitive throttle. Control will be by a spring loaded, centre off, switch, I think, or maybe a couple of push buttons, to just give it a pulse of power to move in the required direction. The gearbox makes the trigger motor lock up when the power is off, so it stays put OK. |
|
|
The motorised trigger looks a good solution, and with a steerable outboard you have no need for a rudder of course. You will also have a strong steering moment to get you around the turning mark. I'm hoping for lots of weed but your folding prop might solve that problem too.
|
|
|
Any news on the pink punt?
|
|
|
I'm waiting (in vain.....) for the wet weather to ease off so I can get it painted. My build area is a car port, and it gets a bit damp in there with the wind blowing the rain in the open end. I'm keeping my fingers crossed that the wet weather will ease up and coincide with a period when I've got a couple of clear days so that I can get Quackers finished.
I've decided on a traditional colour, grey, as that seems to be the colour that many of the old duck punts were painted. Following CWs recommendation, I've bought some of the Jotun high build epoxy primer and Jotun satin finish PU topcoat. Part of me would like to add a gas-fired mock punt gun on the foredeck, for a bit of added excitement, but somehow I don't think I'll get time. I've been looking at some web sites on making spud guns (a search of YouTube comes up with a few fairly crazy devices) but if I added one it would be minus the projectile firing capability, for safety. |
|
|
A water cannon would be a lot of fun.
Brian |
|
|
The cool weather has been a real pain, as the Syntac EPAFD really doesn't like curing when the temperature drops. It initially cures to a slightly soft state, stays like that for a couple of days or more, and eventually goes hard when it gets warm. I'm sure the stuff is fine if used in warm conditions, but frankly I wish I'd stuck with West, as I know how that behaves.
Still, today saw the last of the glassing completed, albeit with some mods from the original plan. Rather than stick the drive unit on the transom, and have to use a long push-pull tiller and a remote control for the drill trigger, I decided to add an internal outboard well, with an infill piece to stop splashing. This has added a bit of weight, but has the advantage that I can now reach back and directly control the drill and steer it, and I can tip the unit up to get it clear and clean weed off if needed. I've also added a foredeck and buoyancy chamber, mast thwart and step, and a small buoyancy chamber aft. Weather permitting, tomorrow should be a sanding a filling day, prior to painting, hopefully ending up with some more pictures. |
|
|
Mast step? Does this mean that you will have to add some kind of centreboard in the future?
|
|
|
Luckily the Duck Punt seems to sail well without any centreboard, lee board or whatever, meaning it can sail in just a few inches of water: http://www.youtube.com/watch?feature=player_embedded&v=y_qFvMbrMWw
|
|
|
In reply to this post by Alan
No, no! Keep up at the back!
The whole point of this craft is that it is for shallow waters and relies on the hard chine to act as the keel. According to Dylan Winter you just dangle a foot over the side to ensure that the boat heels a little and the hull shape does the rest. See him sailing in no more than six inches of water: http://www.keepturningleft.co.uk/category/duck-punt-films/
Greg Chapman
GregAfloat - My Boating Biography |
|
|
Ok, Ok, I see it but I can't quite believe it; and he says he can sail upwind too. |
|
|
On 21 May 2012 at 14:23, Alan [via UK HBBR Forum] wrote:
> GregHBBR wrote > > > > See him sailing in no more than six inches of water: > > > > http://www.keepturningleft.co.uk/category/duck-punt-films/ > > > > Ok, Ok, I see it but I can't quite believe it; and he says he can sail > upwind too. > No problem, foils are just a nuisance. I have been doing fine, on a larger scale, for the last 10 years. (I need 9 inches of water) -- Hoping for calm nights Alastair Law, Yeovil, England. <http://www.little.jim.freeuk.com> |
|
|
In my younger windsurfing days (......pause for happy memories.....) it was common practice among intermediate/experts trapped in light winds to shuffle forward a few inches and dig the leeward rail just below the water.
Shorter boards have no dagger-board and one small fin at the rear, but "railing" improved upwind speed with the sail raked backed slightly. We could only manage 70-80 degrees to the wind but it was a useful skill to develop - the racers used the technique all the time. What's interesting is the well rounded chine on a windsurf board provided useful uplift. -Paul |
|
|
Am I sick and tired of filling and sanding in this weather? You bet.................
I've given up trying to get a really good finish and decided that tomorrow, come what may, I'm going to start painting. If it looks a bit rough around the edges at Beale then that's just too bad. Here are a couple of snaps of the boat almost ready for painting, it just needs a final rub down this evening, when it's a bit cooler outside. The hole in the hull is intentional, it's the "outboard well" that the drill powered drive leg pokes down through. I have a cunning plan to seal this up with a tight fitting internal cover so that there's no turbulence from that gaping hole. 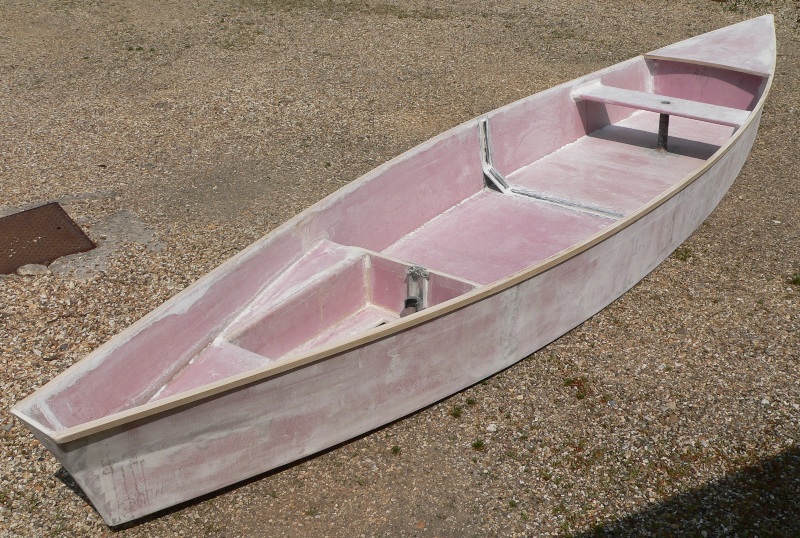 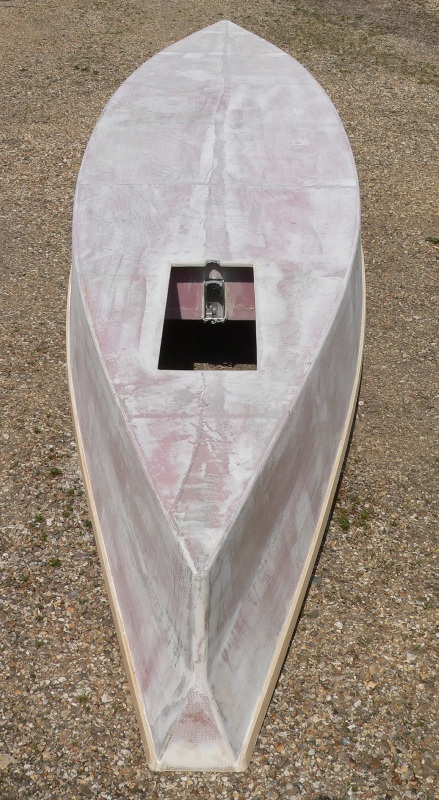
|
|
|
Jeremy,
Don't worry - there is always a tipping point when life is too short for sanding and filling. We done so far and I hope I can try her out with a paddle at Beale. Watching the videos I can't help thinking stitch and screw would be easier than a jig. -Paul |
|
|
You're right, Paul, stitch and glue would be a simpler and there are plans for one built that way from Flo-Mo. The jig build method is really best suited to the very heavy ply construction with lots of framing that all the West Mersea Duck Punts sailing today use, although originally they would all have been of planked on frame construction, I think, probably with athwartships bottom planking, rather like the way old barges were planked.
I used the jig to hold the foam panels in place whilst I glassed the outside of the hull, although looking back on it I think I could probably have done a better job by glassing up the foam on a flat surface, cutting the panels out and then building the hull up rather like stitch and glue. One problem with that method might be that the panels may be too stiff to bend - once glassed on both sides the 10mm foam is incredibly stiff. Maybe I could have glassed the foam sheets on one side only, then glassed the other side after the hull was put together. One things for sure, I'm not likely to use that roll of 300 g/m² rovings again, as it was a pig to fill and get smooth. You're welcome to a go at Beale. After the CCC I'm planning on trying out an outlandish form of sail on it, a solar powered Flettner rotor. I just need to come up with an easy way to make a very light cylinder around 400 mm in diameter and about 2.5 m long. |
|
|
It's looking great Jeremy, is that a carbon frame amidships? I'm painting all woodwork on Four Candles matt black; it's as fast as carbon fibre.
'looking forward to the Flettner rotor build blog. |
|
|
Thanks Alan. Yes, there is the odd bit of unidirectional carbon fibre in there, the amidships frame, the mast step tube, a bit to stiffen up the motor mount transom and some carbon on the bow to make a nice stiff stem.
Today's looking OK for painting, I hope............ |
|
|
At last the painting is finished!
I managed to rig up a tarpaulin tent over the hull (it sticks out the end of my car port) and got the final coat of Hardtop on the hull this morning. It isn't pretty, but it'll have to do. I tried an experiment on the inside of the hull (which is pretty rough, with the weave of the glass cloth clearly showing everywhere) and used some cheap two pack, water based epoxy floor paint. Apart from its fairly poor coverage, and the fact that it's very hard work to roller on (it's pretty gloopy) I think it's quite a success. It seems to cure to a pretty hard semi-gloss finish and it's great being able to wash stuff with water afterwards. Being water based it doesn't attack rollers, either. Talking of which, I found that the high density foam rollers that I bought from SML aren't attacked by the Hardtop HB, which is worth remembering. Ordinary foam rollers from Screwfix seem to last about 10 minutes or so before going very squidgy. The only thing left to do now is remove the masking tape around the gunwales and give the bits of wood a quick coat of something, probably Synacryl CV, as it cures very quickly. If the paint cures enough to turn the hull over I'll try and take some photos later. Talk about a last minute rush before the weekend.................. |
|
|
Phew...............!
I've just loaded Quackers on to the trailer, ready for an early start to get to Beale Park tomorrow morning. I ended up varnishing the gunwales under a tarpaulin last night, and only doing the final touches to get her ready in the last hour or so. Just need to charge up the drill batteries and load the car and I'll be ready. Here are a few photos of Quackers in finished form: 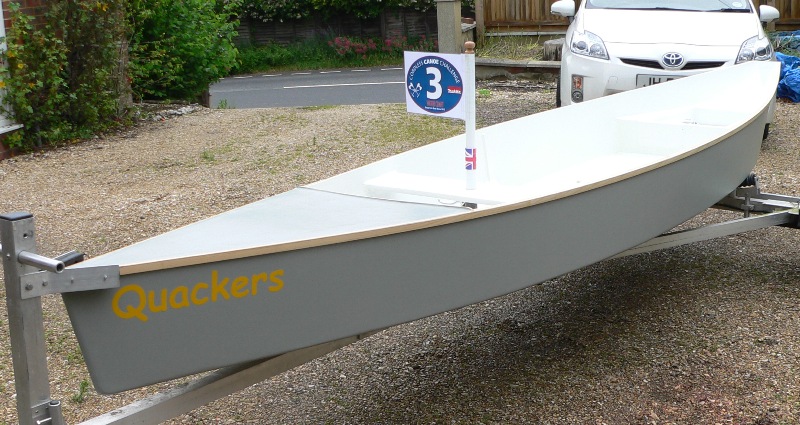 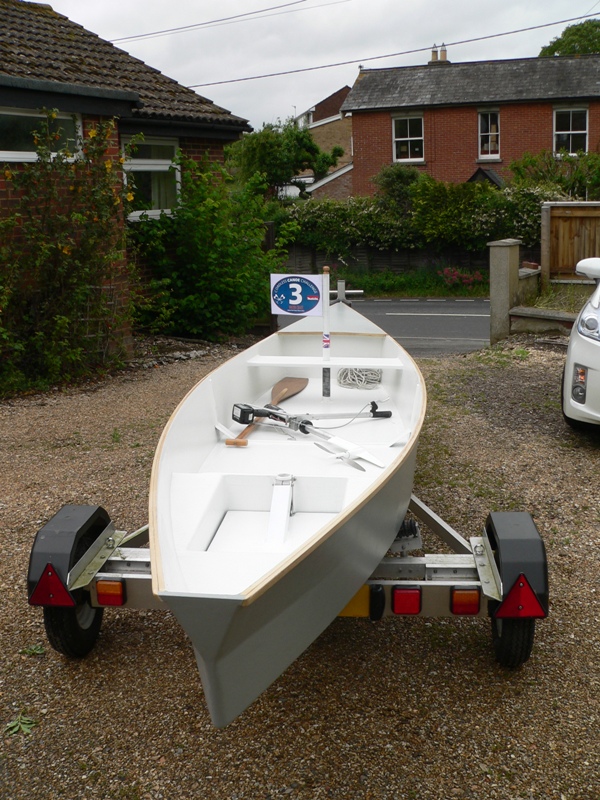 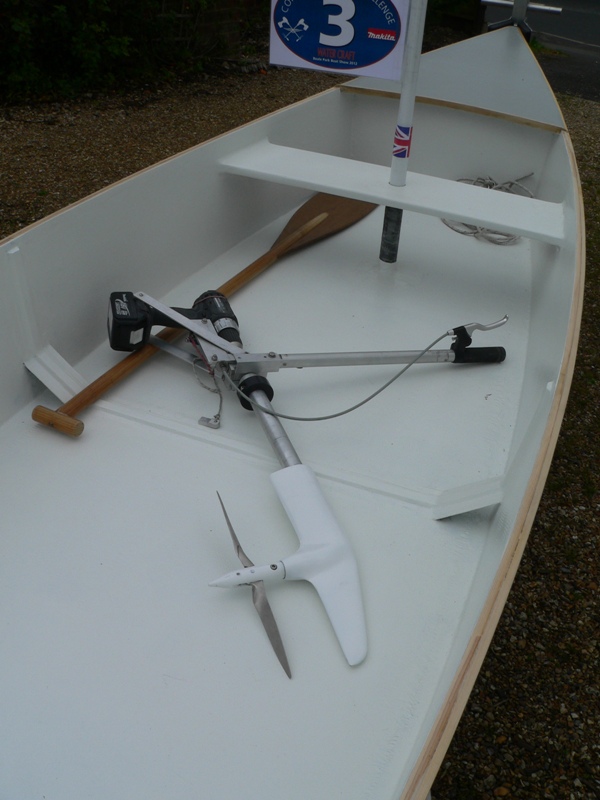 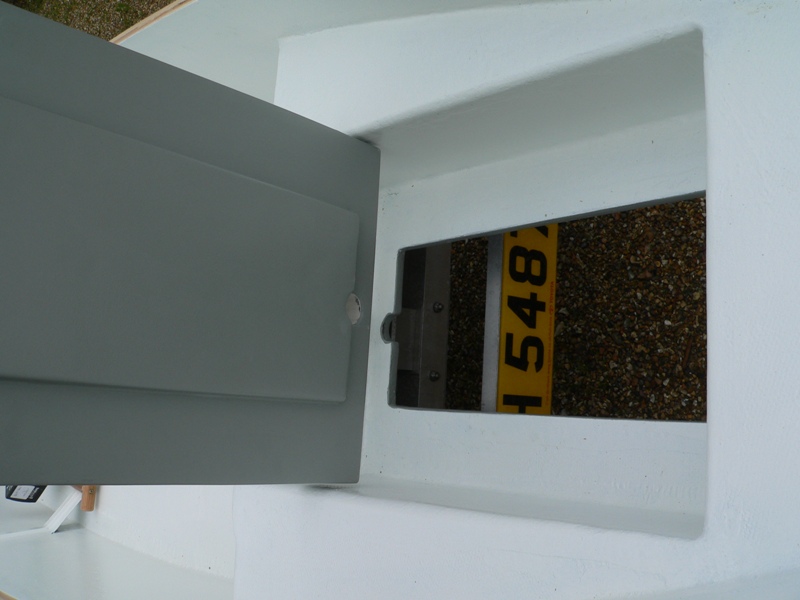 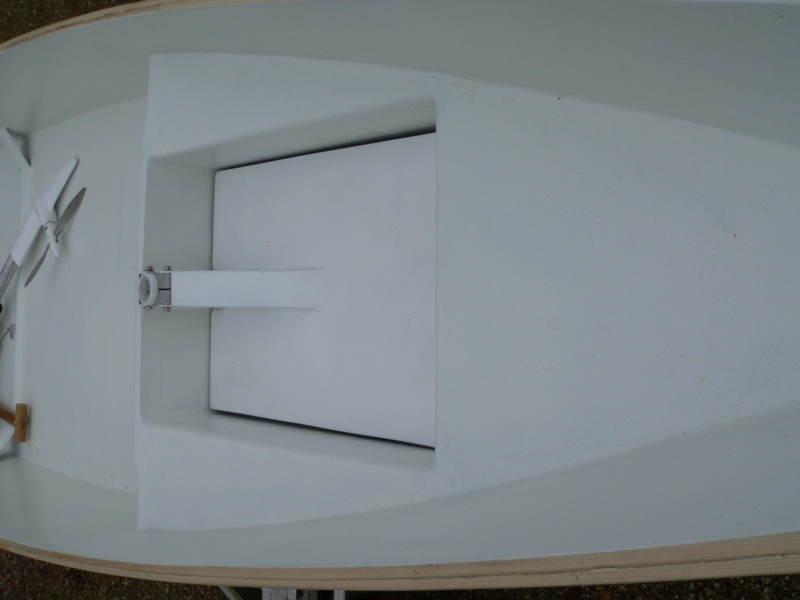 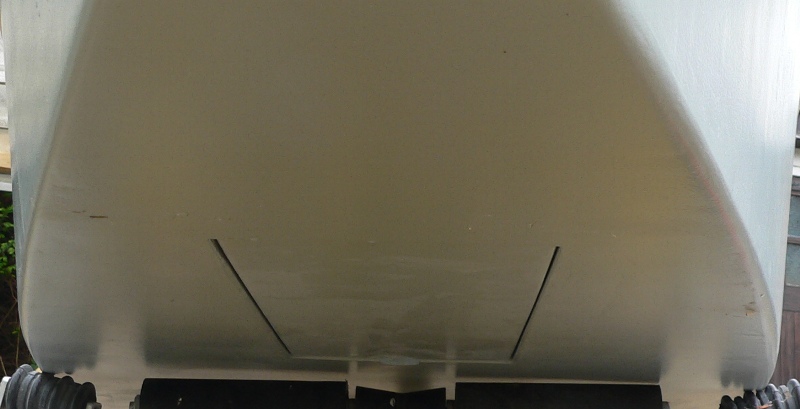
|
«
Return to Builds in Progress
|
1 view|%1 views
| Free forum by Nabble | Edit this page |

