New Gunnels
12
12
|
|
Warning: Some viewers may find these images upsetting.
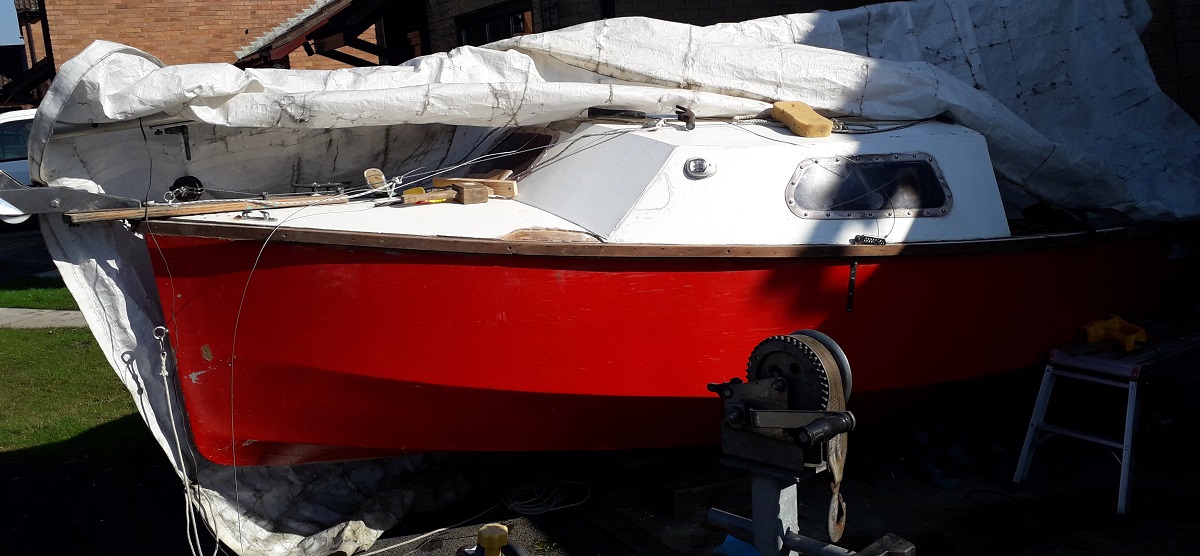
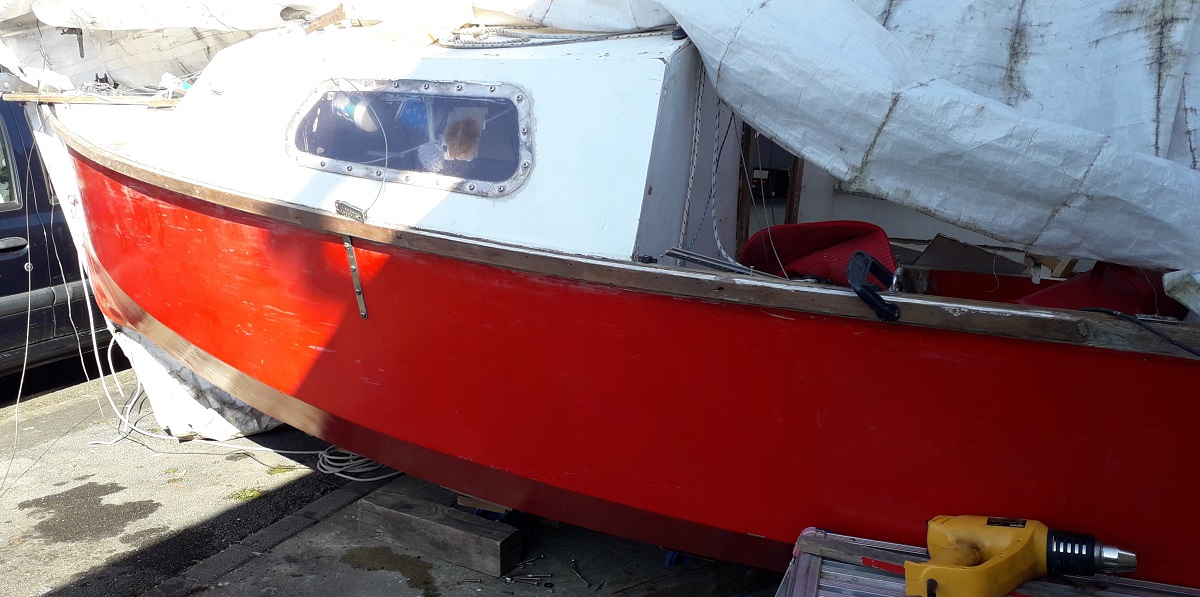
I noticed some rot in the softwood gunnels I fitted 15 years ago, so started clearing out the rot with a chisel in one hand, until I found good wood. Here is the result: 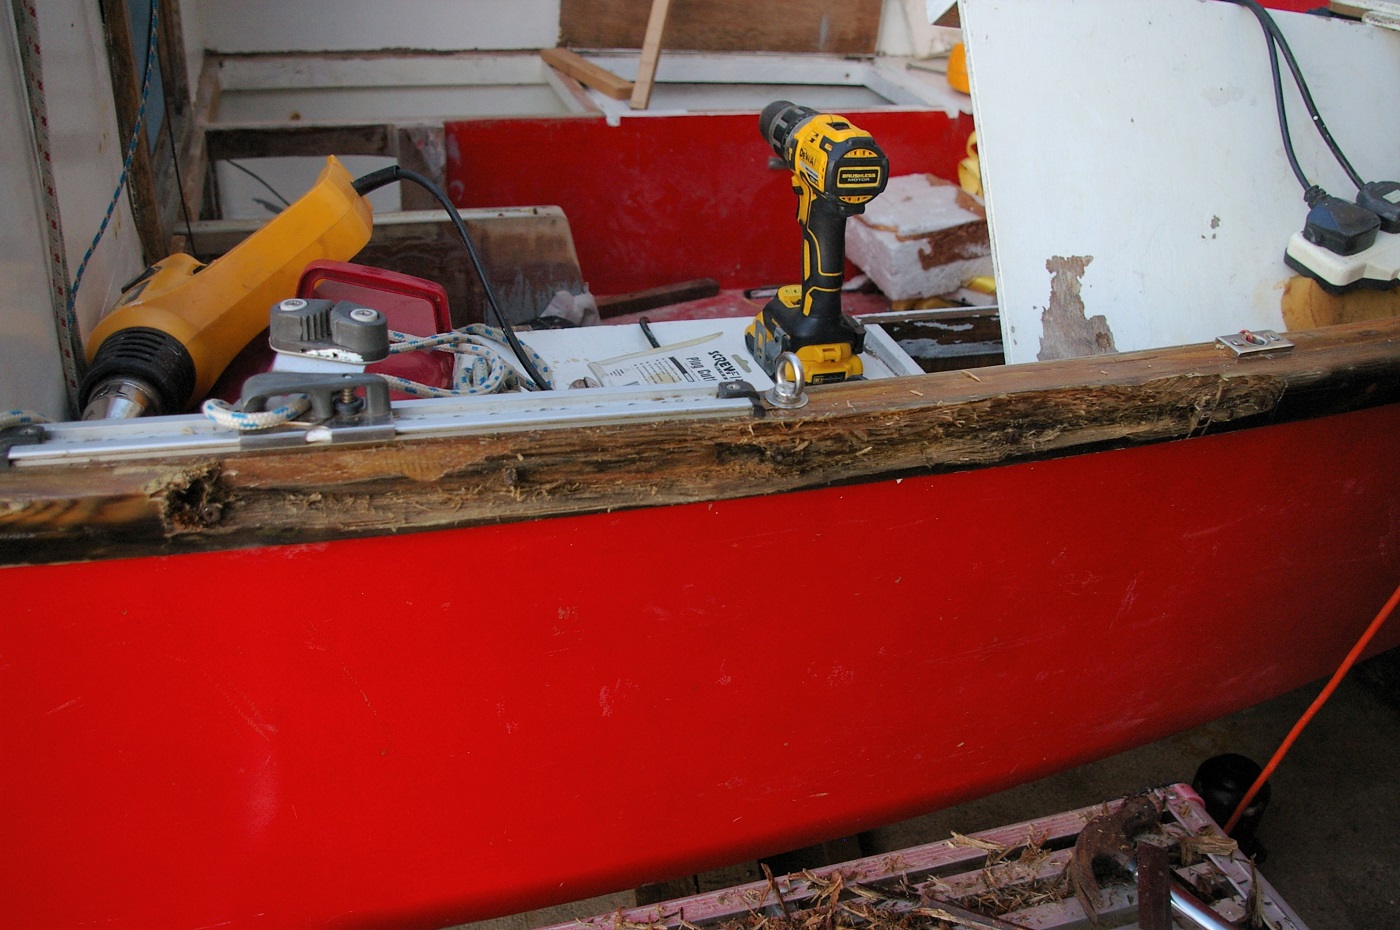 The eagle eyed viewers will also notice the locker lid that needs repainting, and the Starboard seat has been removed because a joint had cracked. More about that later. At the time I had the brilliant idea of leaving 28 steel screws in each gunnel "to make her stronger". What were you smoking Paul? It's now a complete bugger to remove them; I will fit Iroko this time. The heads snap easily, gripping with a mole grip wrench is the only way to unscrew what's left. Underneath the original glass sheathing is in good condition: 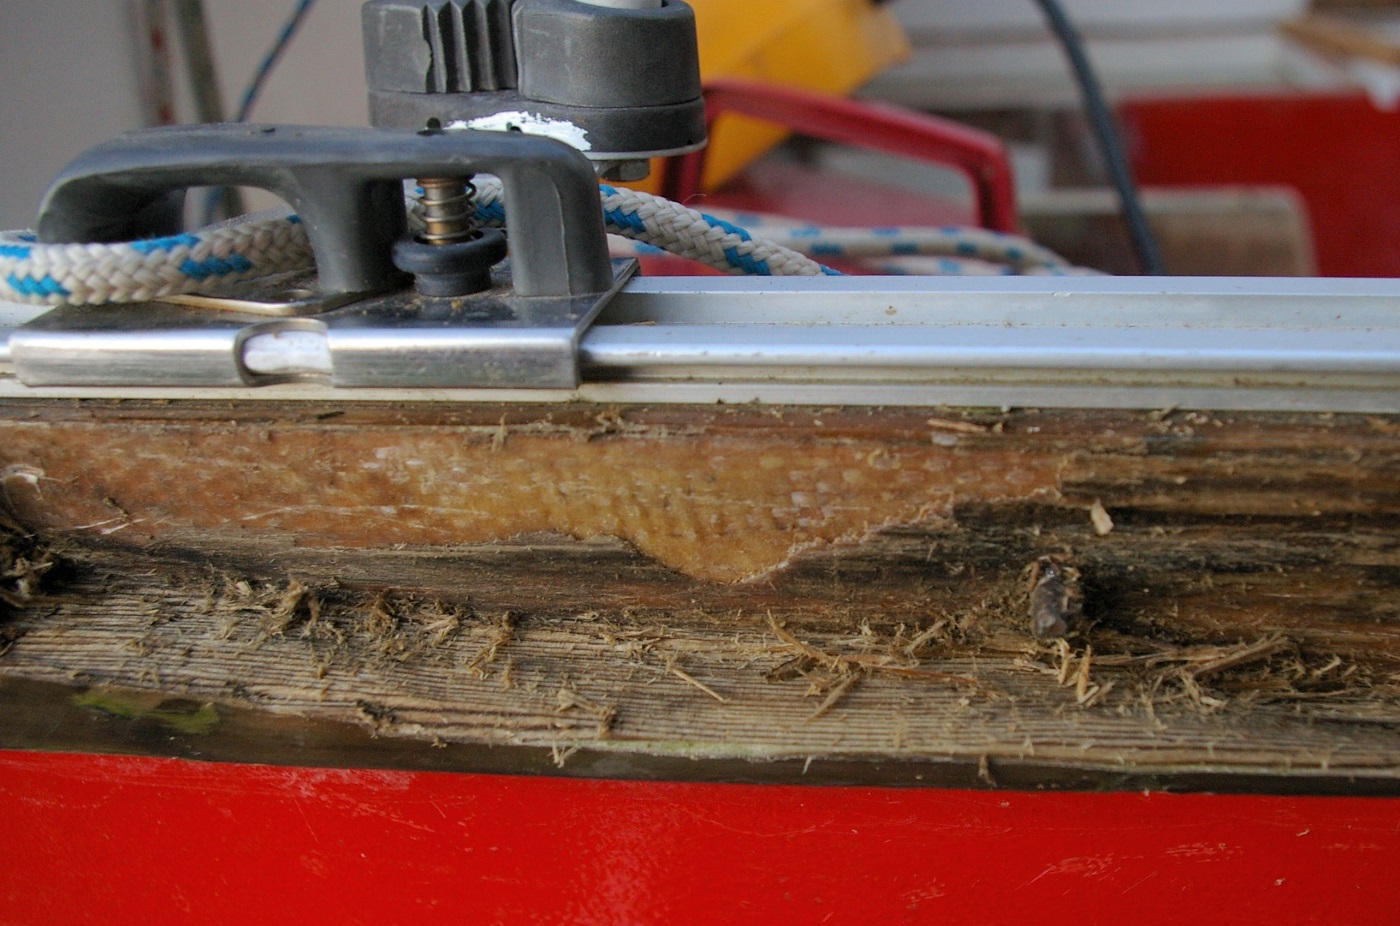 I'll clean up flush to the sheathing then paint with the hull colour. Then the new gunnels will attach with a few stainless screws, detachable to touch up the oil. A circular saw with a blade to cut nails would quickly slice within about 5mm, clearing the rest with careful chiselling. But the screw threads might be hard to grip; angle grinding would remove them with a slight risk of damaging the sheathing. Ok chaps, can anyone suggest other ways of removing these gunnels? Thanks Paul |
|
|
This post was updated on .
The angle grinder is your friend for jobs like this. You will certainly knick a bit of sheathing here and there, just patch it up with some thickened epoxy.
Sent from my Xperia by Sony smartphone ---- Paul (admin) [via UK HBBR Forum] wrote ---- > Warning: Some viewers may find these images upsetting. |
|
|
In the interest of safety do NOT use a circular saw blade on screws, nails etc. As Graham said and angle grinder is more appropriate . And let the whole area dry out thoroughly , any dampness will only make matters worse.
Richard |
|
|
In the end the best solution was: vertical saw cuts* alongside each screw, then careful use of a one inch Marples chisel. Just like our woodworking teacher told us!
The wood was incredibly damp in places. I don't know how the water got in, but it wasn't getting out! In places it broke away from the sheathing cleanly, I chiselled 3 small patches of sheathing accidentally but that was an excellent result after removing 98% of the Port gunnel. Four screws were removed intact with a mole grip wrench, the rest snapped so I'll have to grind or file them flush tomorrow. I have enough Iroko left for one side but a splice/scarf is needed. Also enough 1m blocks of Teak for both sides picked up cheap at the Beale Park Boat Show, RIP. * A Stanley floorboard saw was great, fine teeth and a thin kerf. Pictures tomorrow readers. Paul |
|
|
As it happens Paul I am about to fit my brand new gunnels today. Any tips the future 15 year older myself would want the today myself to do?
My plan was to epoxy coat a strip on the outside of the hull at the sheer, epoxy coat the inside of the gunnel itself. Let them soak for 10 minutes then squeeze a bead of thickened epoxy on the gunnel, fit it to the hull and use short screws and clamps to hold it in place. I was going to leave the screws in place but that might not be wise?? I'm finding this technique of soaking the joining pieces with unthickened epoxy and then applying the thickened epoxy glue is amazingly strong. I haven't done a load test on some samples to see if there is any difference to just wacking glue on the pieces but it seems like it works so I'm going with it. Jason |
|
|
Hi Jason,
No problems encountered with leaving the screws in place as long as they are stainless steel and kept away from salt water. Steve 
|
|
|
On my little gaffer I used something Irokoid; Heaven knows what as I don't speak Urdu.
The ply hull was fully epoxied and polyurethane two-part painted first - 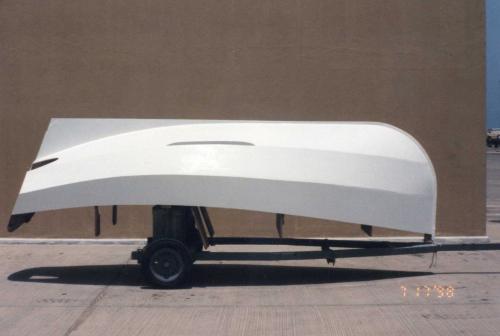 Then after the decks were on and sheathed, the rubbing strakes were epoxied on the inside face for protection and allowed to set. I probably set them up with an approximate curve to ease the fitting. From there I screwed them home with stainless screws every six inches from inside the hull through the inwale. Only the fore and aft ends had large stainless screws driven in from outboard to be sure they didn't just unzip if they came under real stress. I wasn't up to making wood plugs so those end screws were gobbed over with waxy, oiled sludge to hide the heads. I felt it might be necessary to remove them at some stage as the chainplates were cut in underneath and through-bolted before the strakes were fitted - 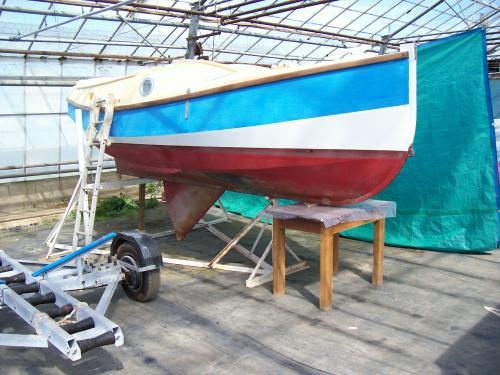 Twenty-two years on and counting Chris |
|
|
This post was updated on .
In reply to this post by Jason Mayer
Actually, Jason
For a dinghy rather than pocket cruiser, I usually build without inwales and only an 'out' or gunwale. These are simply brass-screwed and epoxy-glued in place, after sheathing the hull -   This is aided by my little lugger being half-decked, so that there is no exposed inboard upper edge, but it worked for the rowing skiff as well, where a large part of the cockpit sides were otherwise unsupported - 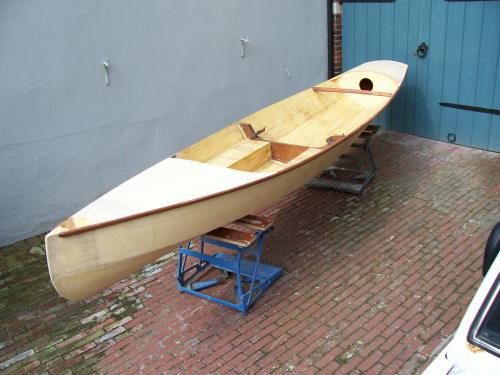 Do bear in mind that the torsion stresses on a sailing hull are much higher than that of a rowing skiff. Of course brass screws corrode in salt water, but they do not have the notable swelling problem associated with rusting and they are entirely buried in epoxy anyway, so are less likely to be affected. Again, no problems apparent thus far Nine years for the lugger Chris |
|
|
In reply to this post by Jason Mayer
Jason,
Use good hardwood, clamp well to avoid air pockets. I set the in/out whales 3mm higher than ply end grain, then fill the gap to seal the end grain. Ideally cap the end grain with hardwood, like rebating by the ply width. Paint can crack at 90 degree edges, I get better results with well rounded edges. Best of all, keep her in a garage away from rain and sun. -Paul |
|
|
Thanks everyone.
We'll I'll leave the screws in there then. I put the first (thickest) layer of outwale on with epoxy as described and s.s. screws every 6 inches from the inside to pull it against the hull. I got heaps of squeeze out so I'm happy that is sealed. I have another layer of outwale to laminate on and I was going to put a small inwale on the inside (glued only) to cover the screw heads. I'll put some photos over in my topic. Jason |
|
|
In reply to this post by Jason Mayer
Jason, it sounds like you have the gluing nailed ha ha.
Patience is a virtue, good joints are never starved of epoxy. A coffee or cold beer is recommended, and if you want another slap on some more epoxy! When epoxying end grain, it's definitely beer o'clock. 
Paul |
|
|
In reply to this post by Paul H (admin)
Now the latest news.
Cutting the rusty screws proud by 2mm, then switching to a 6mm metal grinding disc gave the cleanest result. 20 screws later whiz up and down with the power sander. It's ready for epoxy filling then painting with red/white. 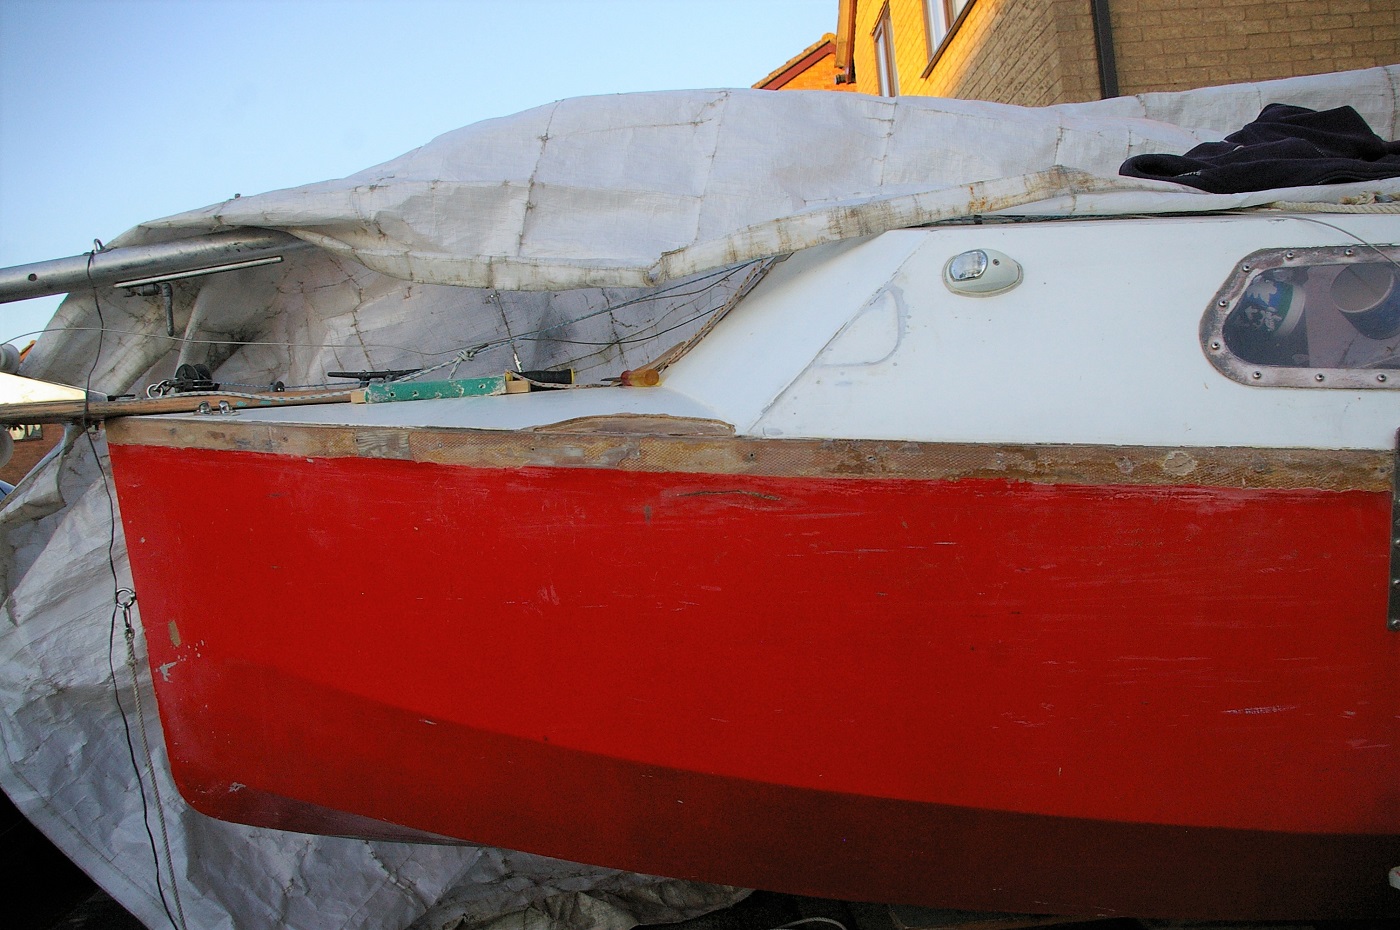 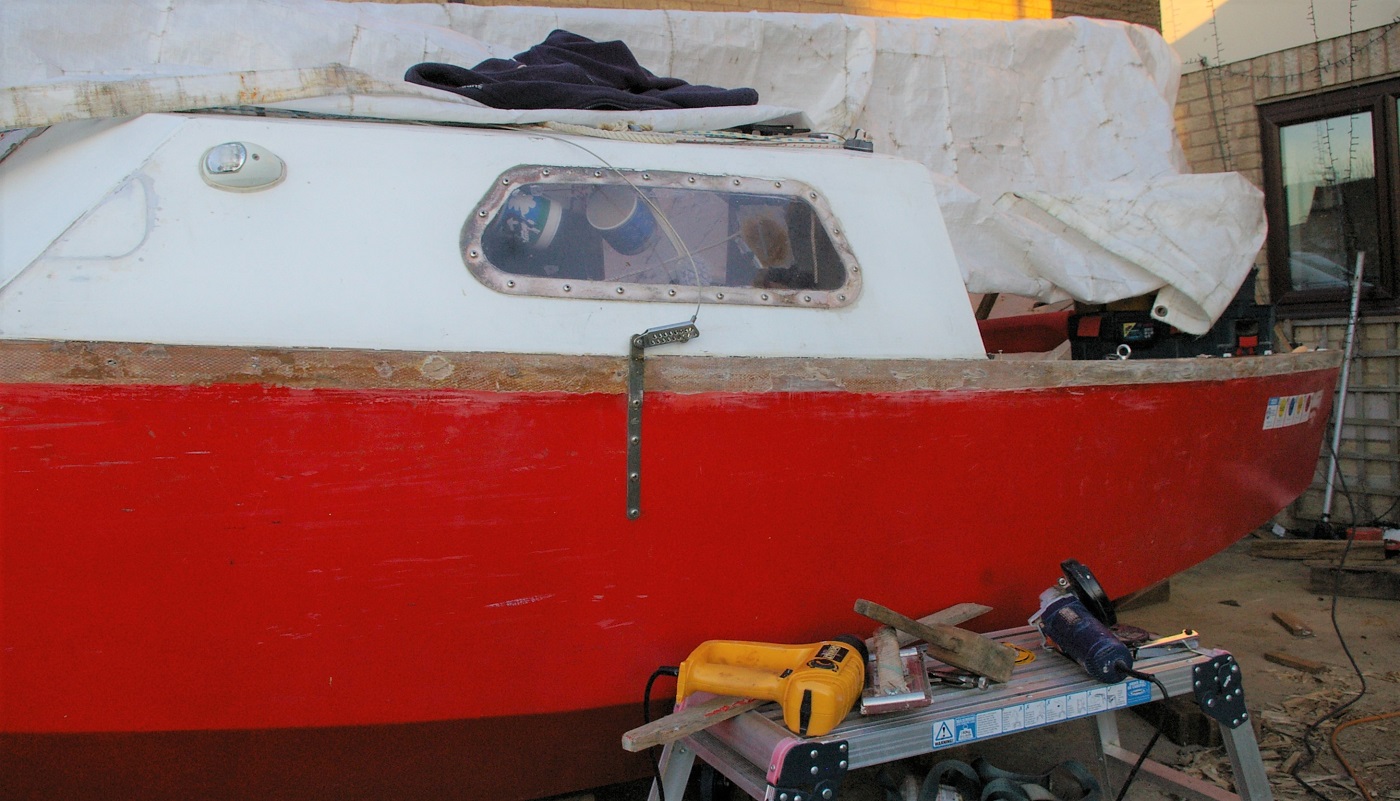 The dodgy deck ply raised its ugly head again; so scrape with a chisel until it stops falling apart. The ply layer underneath is in perfect condition. Was I sold interior ply?  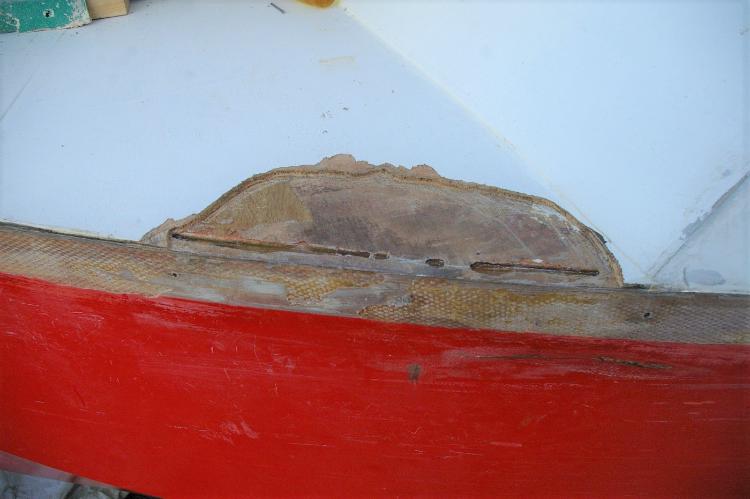 I'm planning the replacement gunnel. Removeable, oiled hard wood that can air dry seems best for a pocket cruiser. I have Oak and Teak, but only up to one metre long so that means a lot of scarfing. Best option looks like Red Mahogany frames from a Heron, about 35mm x 20mm and already curved. Might have to glue two pieces side by side, staggered like brickwork. There are annoying screw holes, is it ok to drill them out and glue in Beech dowels? Dowels or biscuits could be useful to join two pieces together. I also have rubbing strakes from a Mirror and a Heron, perhaps the Red Mahogany could be capped with the rubbing strakes (or the Mahogany glued permanently and the rubbing strakes screwed)? -Paul |
|
|
Here is a quick mock-up using the Red Mahogany, not bad eh?
  If I fill the nail holes with epoxy, will a quality boat oil provide UV protection? Paul |
|
|
Excuse me Sir, but your Boat's obstructing the Pavement....
I may have to give it a parking ticket. No, I doubt any wood oil will protect epoxy from UV; that would be too convenient. How about some brown silicone sealant? As I was not up to making plugs, that added to the reasons for screwing through from inside the hull on the baby gaffer. Means I can laze back in the bunk and admire The stainless screw heads Chris |
|
|
This post was updated on .
https://www.toolstation.com/titanium-plug-cutter-set/p72650
Or buy a set of plug cutters. Sent from my Xperia by Sony smartphone |
|
|
In reply to this post by Chris Waite
Screwfix sell Liberon oil, for indoor/outdoor use, with UV inhibitors:
https://www.screwfix.com/p/liberon-superior-danish-oil-clear-1ltr/1422f Not for external Oak though; pure Tung oil instead. Worth trying, as I want to learn about oiling wood. I have no intention of plugging screws as I want the gunnel to be removable atm. Paul |
|
|
I use Danish oil on my hardwood trim on the Dabber, goes on easy, touch dries quickly,smells pleasant enough, not inclined to self combust ,like Linseed oil does, Linseed also turns black.
Linseed has to be used with care, anything used to apply it can self combust, so needs to be disposed of carefully, I have not witnessed used rags combust, but have experienced exco thermic warming with it, I won't use Linseed oil now ,Danish oil is far better. |
|
|
In reply to this post by Paul H (admin)
No. Oil needs to soak into the wood. Epoxy will stop that. Try using something like Brummer stopper. I don't know that it will work but it might and you can get it in various colours. Simon |
|
|
In reply to this post by Grldtnr
I'm now a convert to Danish oil, which darkened the Red Mahogany. I had carefully put drops of thickened epoxy (wood flour mix) into just the nail holes. Filing with a 2nd cut file removed the high spots, then my trusty 1/2 sheet sander cleaned and smoothed the entire length.
The oil darkens the wood and from a few metres away nobody will notice the filled nail holes. Ideally I would have darkened the thickened epoxy a bit more, but I'll leave that till another time. Only one coat today, recommend number of coats is 3 to 4. I did take a picture, but when I opened my laptop tonight I realised the SD card was missing from the camera and still in the laptop. Oops. -Paul |
|
|
In reply to this post by Paul H (admin)
I'll be picking up a Sapele 4x1 plank from Robbins very soon; I'll create two strakes.
I'm leaning towards screwing from inside the hull/cabin, sealing with silicon and coating the Sapele with oil, What are the views about screwing from inside or epoxying the strakes in position? What have you done on your boat? Paul PS My reason for using screws: Easy maintenance/repear. No epoxy to protect from UV. Foredeck and cabin are already strong. |
«
Return to General Discussion
|
1 view|%1 views
| Free forum by Nabble | Edit this page |

