![]() |
The glorious 16ft Yachting Monthly Senior had "sufficient room to dress standing up". Jolly civilised I say.
So a new plan is hatched; lightweight 6mm curved ply, length 33in so quite a beast: ![]() ![]() There are many opportunities in the cabin for hinges and catches; but I think rope hinges at each corner would be ideal: ![]() Then it can lift up high creating lots of space, like a Broads Cruiser. After scandalising the rig! ![]() ![]() For fair weather, or under a boom tent, the hatch can stow in the cabin creating enough space to stand either side of the centre board: ![]() So the big question is: How do I make rope hinges work and how will they stop the hatch blowing off when towed at 60mph? cheers Paul PS It's much lighter than the previous hatch. When lightweight flexible Solar Panels come down in price I will fit one or two over the hatch curve. |
![]() |
This post was updated on .
Hi Paul
Nice. Even headroom for someone my size there! Not sure if it helps but thought the hatch design used by Chesapeke canoes might trigger thoughts: Webbing straps with clip buckles. I've used this approach on my Chesapeke 17 and it holds hatches down very firmly. Would work when towing, but no use when you're on board so probably not a perfect solution as is. AsI said... may trigger thoughts. Tim. > On 28 Mar 2016, at 14:25, Paul (admin) [via UK HBBR Forum] <ml-node+s967333n4029346h39@n3.nabble.com> wrote: > > The glorious 16ft Yachting Monthly Senior had "sufficient room to dress standing up". Jolly civilised I say. > > So a new plan is hatched; lightweight 6mm curved ply, length 33in so quite a beast: > > > > There are many opportunities in the cabin for hinges and catches; but I think rope hinges at each corner would be ideal: > > > > Then it can lift up high creating lots of space, like a Broads Cruiser. After scandalising the rig! > > > > For fair weather, or under a boom tent, the hatch can stow in the cabin creating enough space to stand either side of the centre board: > > > > > So the big question is: How do I make rope hinges work and how will they stop the hatch blowing off when towed at 60mph? > > cheers > Paul > |
![]() |
In reply to this post by Paul H (admin)
Hmmm, try telling that to your missus! David. |
![]() |
In reply to this post by Paul H (admin)
Excellent Paulie
My suggestion(s) s’s’s as follows – 1. Obviously anything so vital must be attached to the boat so that it cannot leave without your express permission; you really do not want to be in the middle of Chichester harbour entrance in a roaring Sou’wester, find your bedroom is open to the elements with the hatch is making its own way ashore - faster than you, to boot. In this case I suggest, bolted eyes, (or even holes in the wood) in line on the forward end of the companion way coaming each side, centred slightly below a corresponding set inside the forward end of the hatch. Lead off to a cleat in a useful position; just inside* the companionway, by your lead-hand for instance. There should be enough line to allow you to lift the whole thing off and stow it wherever it’s going to routinely be when not protecting your living space. Done really, though I would suggest a bolt (each side) under the aft end to keep the thing held down in extremis. 2. Actually, if the forward eyes/holes were offset so that tensioning the line pulled the hatch down and back onto the frame of the companionway, that would be the simplest way of waterproofing the leading edge, particularly if there was a strip of appropriately placed draft-proofing/neoprene present. The other thought is that if the hatch was laid flat just before it slid aft into its closed position, you could have a set of interlocking flanges on each side at the after end holding it shut like the cover on the back of a mobile phone. or similar. The final part of this masterpiece, would be to have the securing line running through a small hole in the top of the aft cabin bulkhead close to the end of the hatch runner with the cleat just below it, so that dropping the hatch over the companionway and pulling tight on the line would automatically slide it into position and dog it down all in one swell foop…. Masterpiece, my port buttock Christo von W (You would have to do away with that huge lip on the back of the hatch - cut it off and fix it to the top inside of the upper washboard - same objective achieved. Also I reckon you'll find the boom spends a great deal of time questioning your motives; booms are King of the Cabin-top.) |
![]() |
Chris,
Do you have time for a quick sketch n scan? I think I know what you mean, but there must be a dozen variations. The hatch does not slide nor does it have slots for the brass rails atm. Maximum slide would be about 150mm (6in). I could have brass rails 100mm long fore and aft. When towing, a clasp/lock to the washboard will keep it securely held back into the rails fore/aft. Or a bolt through the upstand will clamp the hatch securely. ![]() All 3 edges fit flush on the roof; a suitable draught excluder could seal the gaps. As you can see, I cut just enough to get a flush fitting as a starting point. I need to laminate another layer of hardwood over the curved upstand to make the standing area under the mast strong. The remaining 20x20 cleat could be chiseled away each side, the hatch can then slide forward without cutting a 20x20 clearance slot into it. The cabin opens nicely now, enough space for a crew member to comfortably move weight forward in a difficult sea. The centreboard case is a good height for a sitting and one can stand well forward, hold onto the mast then step up on the case; so nice and safe to work on the sails. ttfn Paul |
![]() |
In reply to this post by Timmo
Timmo,
Webbing straps are simple and great for a big canoe. But on a cruiser in the sea you have to multi-task like crazy and the hatch will be low down the priority list - then woosh there she goes, half way to France. But it would float and GPS trackers are getting cheaper........ ![]() As for towing I prefer a bolt either side because the attachment will be very strong. Maybe rope "straps" would work, running through deck eyes bolted to each corner? Same principle but knots would replace the plastic catches. -Paul PS Sorry, I trashed your photo when removing my original message from your post...trying to keep the website simpler. |
![]() |
In reply to this post by Paul H (admin)
Ho Paulie!
I realized that your new hatch has no slides, or rails; this is a miniature Broads lifting cabin top, hinged forward, (though no canvas sides), but you need to make it as functional as possible. I'm sure you have some form of (likely wooden) upright flange round the front and sides of the hole in the cabin top that forms the companionway, yes? If not, get on fitting some such, otherwise, any rain, or worse a greenie sluicing over the cabin will squirt willy-nilly, over your bedding. I'll get back to you as soon as I can, but I'm laying a floor in our new domicile and the scanner is twenty miles away. I also have a Pink Ticket to actually go out on the water on Saturday Time out for good behaviour, sort of thingish Give me a couple of days? CW |
![]() |
Ancient and Marinated,
Good idea. The forward curved up-stand needs to be taller and there are 2 slots to fill at the sides, which is plenty to keep me busy. Don't forget snail mail - it is quick and convenient with no technology to go wrong and no table thumping. Like a cheque, my address is 'in the mail' So enjoy the sail. -Paul |
![]() |
Technology goes wrong, Paulie....
Surely not? 
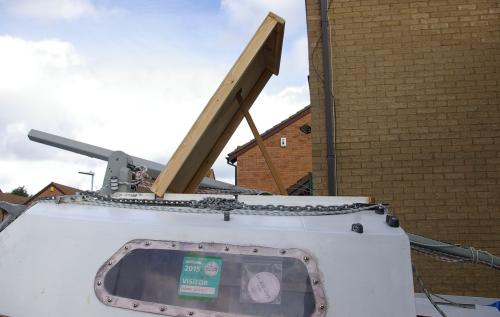
Anyway here is my suggestion, for what it's worth - ![]() 
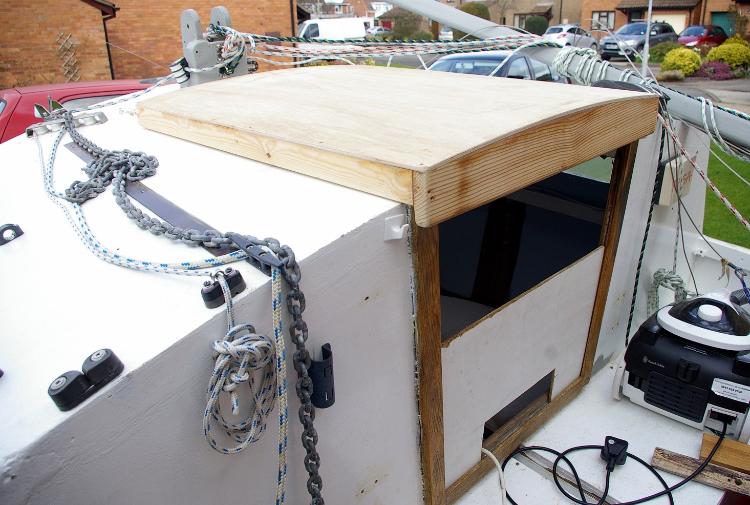
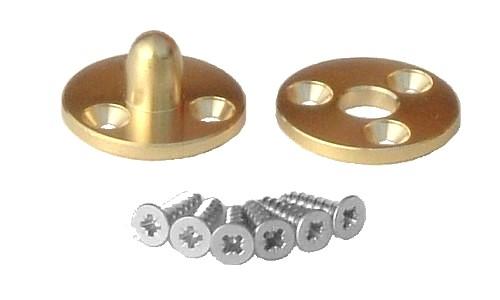
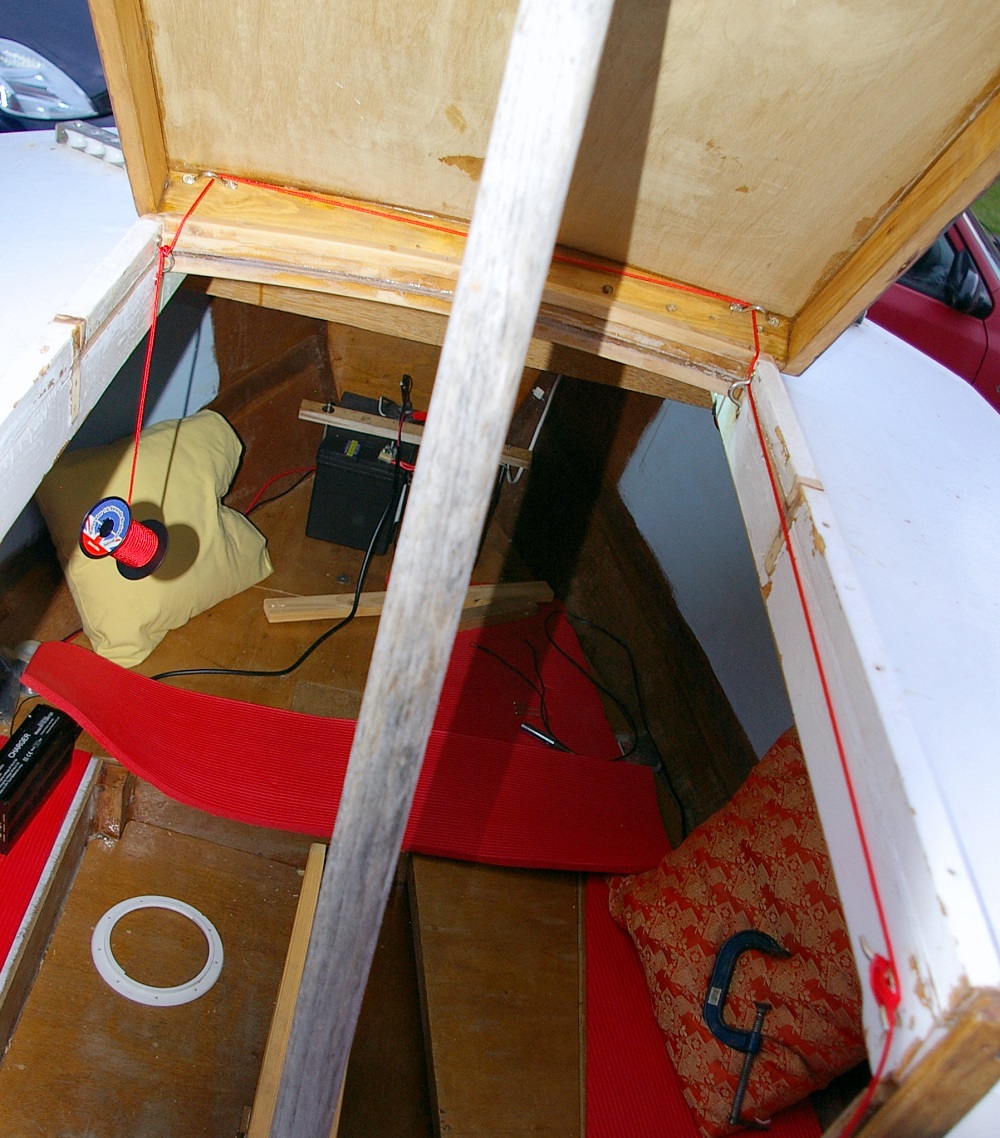
1. Starting from an eye under the companionway coaming on the port* side forward, the line can be clipped to this using a carbine hook (with safety latch). 
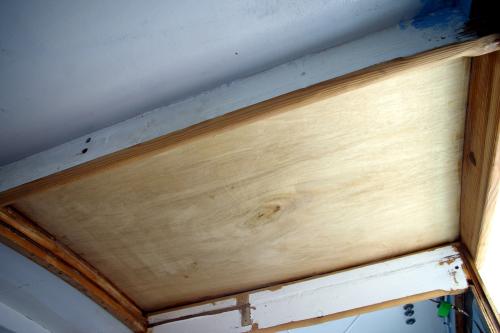
2. the line then passes up through an eye each side inside the hatch rim. Get these as far up and forward as possible with the hatch still able to fully close. 3. The line should then go through an equivalent eye on the starboard side of the companionway. 
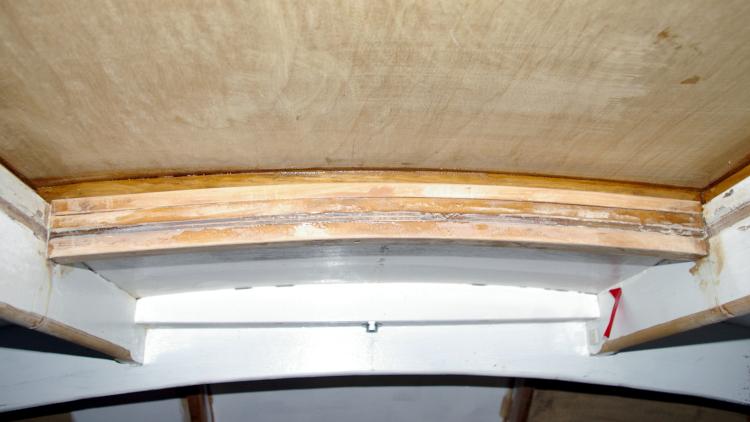
Note that in the closed position, the eyes on the companionway should be located (perhaps 30 to 45 degrees) below and aft of the hatch eyes, so that tension on the line pulls the forward end of the hatch down and back onto and up against the companionway coaming. 
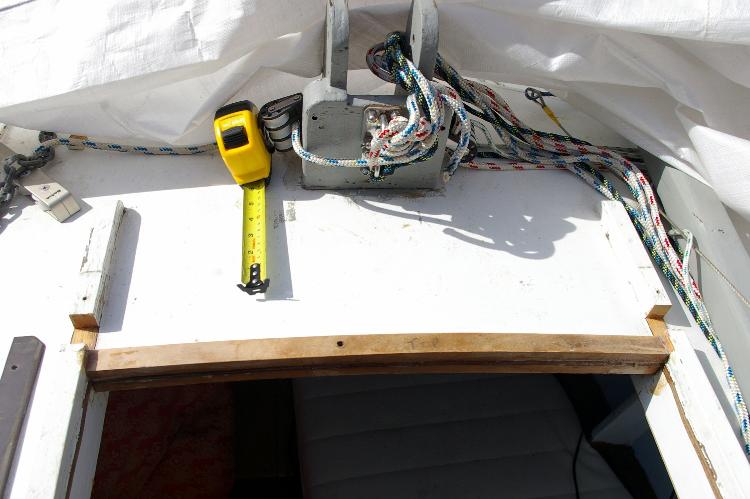
4. Create a (grommeted) guide hole for the line in the upper aft corner of the aft main cabin bulkhead to lead it out to the cockpit with a cleat (?below it) to make it off. 5. To hold the after end of the hatch down, how about a lug on the outboard side of each of the companionway coamings toward their aft ends, with reciprocating recesses in the hatch rim so that dropping it down and then moving it aft by say half an inch, (happening automatically on tensioning the line), allows the lugs to locate over flanges on the underside of the recesses. As I said, like the catches that hold a mobile-phone, battery cover in place - no? This could be more sophisticated if the recesses and/or lugs were angled to dog the hatch down tighter, as it moved aft. 
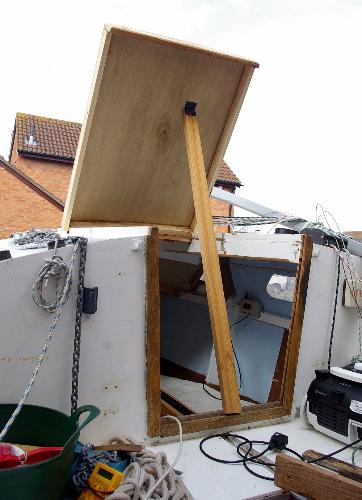
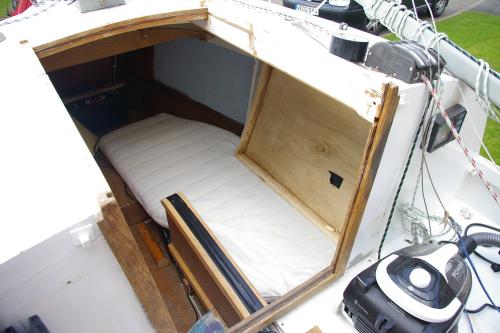
6. To stow the hatch, while getting dressed, or other upright activities, unclip the carbine hook and have sufficient spare line to move it out of the way and lean it in a quite corner. Where it can take a well earned rest Or at least consider itself Off duty CW * If you start the line to port, the working end will come to your leading right hand in moments of crisis. Have some stopper knot, or similar at the bitter end of the line to prevent loss of the hatch (and watertight integrity with it). |
![]() |
This post was updated on .
Thank you Chris, another spectacular sketch with perspective.
I had similar thoughts of eyes, but I do like one rope back to the cockpit. I could also add some strong bungee into* the line; then one simply pushes the hatch forward to open it up, when closing push again and release into the locking lugs. *the line is continuous, but 4in of bungee is tied to 6in of line giving 2in of movement. If/when the bungee breaks one can still lock the hatch. The bungee also gives the small amount of slack to accommodate the hatch opening like a door. The remaining requirement is locking the hatch when inside the cabin at night time. The bungee trick would work, so would an internal cleat. There could also be lugs at the forward end of the hatch, they would act in parallel to the aft lugs. I'm not sure how strong the recesses would be. But I have seen metal fittings for both pieces to be joined - they are used a lot in model railways, to link together sections of track baseboard built on 2x1 frames. For example: A Pattern Makers Dowel would give a solid lock at the forward end of the hatch ![]() These might work at the aft end, on the outside of the upstand. They are 37mm wide and the hatch sides are 44mm deep. But they would only work when fitted vertically, and could jam. ![]() From: http://www.stationroadbaseboards.co.uk/menu_fittings.htm thanks again, Paul |
![]() |
Here is a shot from the inside, showing the new roof beam that is also an upstand. There are 5 laminations at the forward end! The original roof 2 x 4mm, then 2 layers of hardish wood above and one below, about 14mm each.
![]() So there is about 1in of upstand to keep the waves out, plus the hatch that overlaps the upstand and could be pulled to seal the gap. There is room above the upstand for deck eyes in the front corners of the hatch, for the rope based hinge described above. -Paul |
![]() |
That's all coming together very nicely Paulie
I like the bungee-within-the-tie-down-line idea, as well CW |
![]() |
A bit of progress to stop the hatch flying off en-route of Lechlade. Deck eyes in the forward corners, threaded by a line back to a cleat near the washboards - to adjust both in and out of the cabin.
By adjusting the slack in the line it functions like an adjustable hinge: ![]() -Paul PS: To lock the hatch rear when towing, a bolt from the outside into a captive T-nut is fairly bomb proof. At other times a bolt fitted from inside can keep out rain. |
Free forum by Nabble | Edit this page |