The "Aerowherry" a lightweight rowing boat (was going to be a canoe........)
12345
12345
|
|
Alloy tread plate sounds just the job - we have some footplates (known in rowing circles as 'stretchers') made of alloy tread plate in Langstone Cutters' Clayton skiffs and they work excellently. It would fit in with the metal aesthetic of the boat, too.
|
|
|
Chris,
Should I fit angled foot plates in Illusion? I push against floor and bulkhead with heel and toe. Paul Sent from my HTC |
|
|
In reply to this post by Jeremy
Jeremy
I have found in practice that it is not necessarily the height of a foot rest so much, as whether your foot is comfortable on it. With 'Octavia' as a designated rowing skiff, I was going to build all sorts of fancy stuff, but it came down to two practicalities and they work fine. I wanted two rowing positions - one centrally with just myself on board and a second further forward when I have a passenger along. As she comes apart in two sections, there is a 7.5" high double bulkhead directly amidships. For single handed stuff, if I sit with the aft edge of the seat just on this bulkhead and my feet in the after section, she is trimmed just about right. The next thing is to keep both passenger and oarsman as far away from the ends as possible, so they have their feet nudging the bulkhead from each side. So in my forward position I use the 7.5" bulkhead as a foot rest; then alone I use the support under the forward edge of the passenger seat, which is perhaps 4.5". This latter is actually a tad far away and I find it better to put a small fender in front of it - very comfy. Thought I had a snap or two, but they seem to have been lost in the mists of time. In the case of 'Rosie Mae' as a general purpose dinghy I have cut a couple of 'D' shaped holes in the aft floor board, with the 'l' facing aft. The curve of the 'D' cradles the back of the heel and again seems to do fine, though you might want to check in again after a few days on the Thames.... 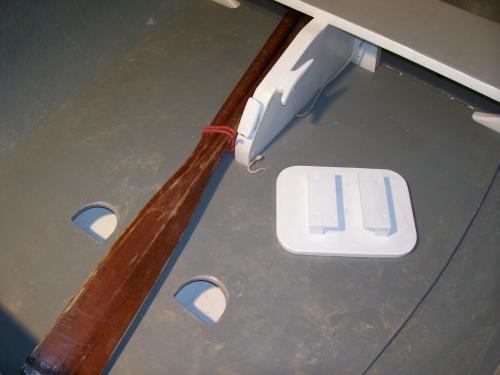 Size Nine Chris W |
|
|
Many thanks for the useful ideas, folks. I went out to the workshop this morning and knocked up a tread plate footrest that seems to look a lot better than just the 1" alloy tube I had before:
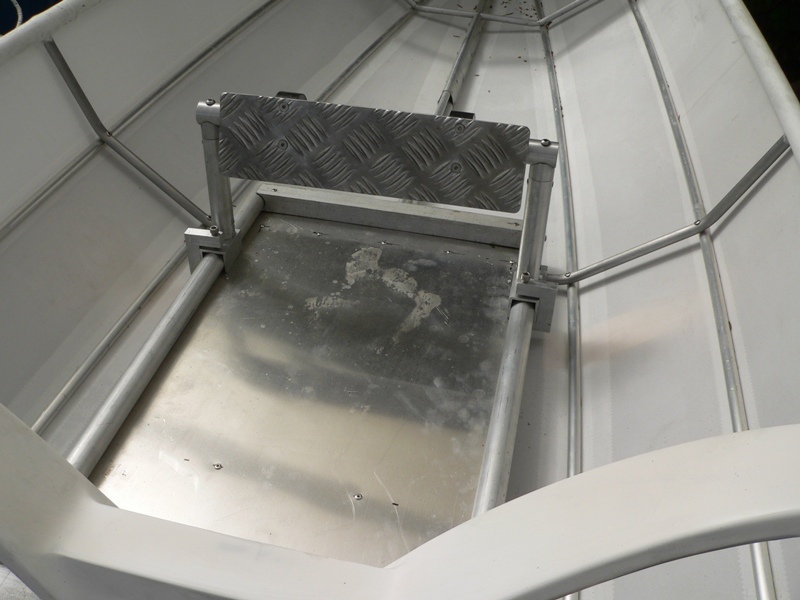 It's fitted to the bar with a couple of bits of Delrin, machined up so that it's a very tight fit but can be made to rotate around the bar with some persuasion, to adjust the angle. 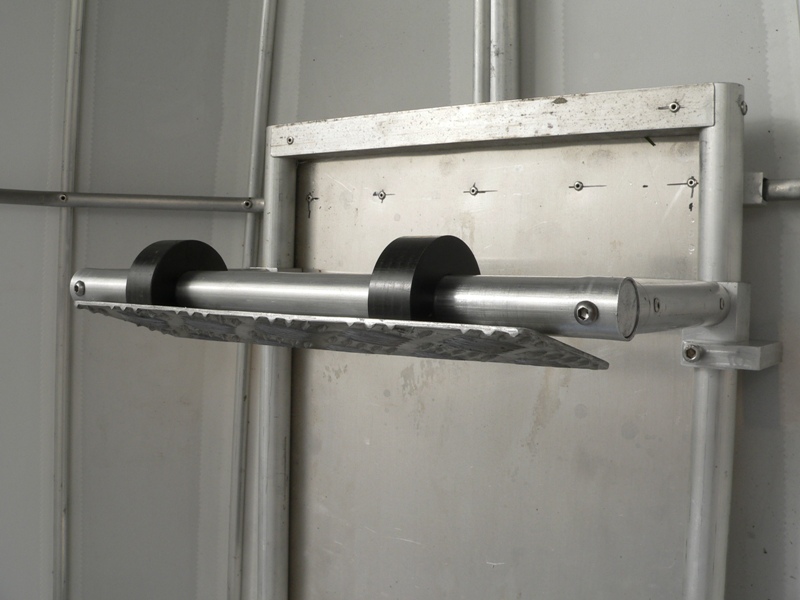 I also took a photo showing the partially finished outrigger arrangement and the seat (the seat will get a more bum-friendly cover): 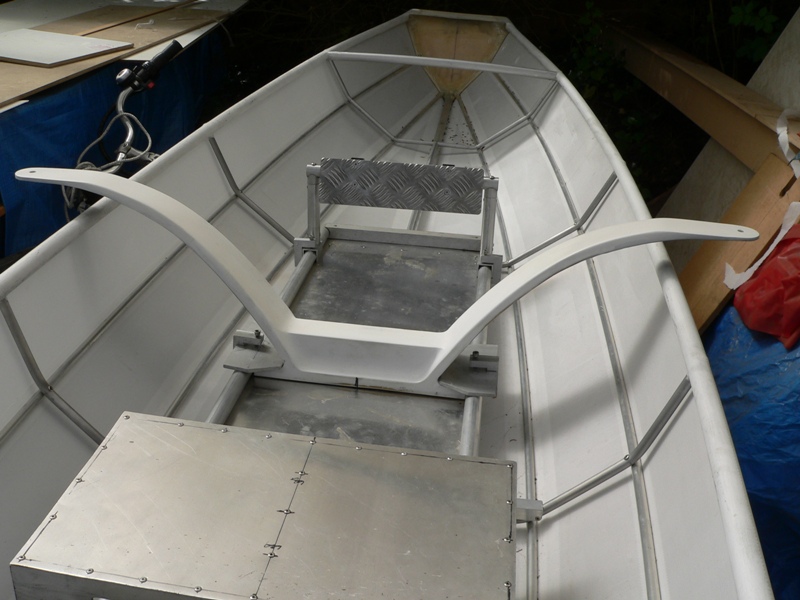 The outrigger needs a bit more work, there are a couple of Delrin blocks that go on the ends to take the rowlock pins and the clamp plates at the bottom still need to be fastened to the base. All these parts can be adjusted by loosening the home-made alloy "G clamp" thingies that keep them in place on the rails, so I can fine tune the position of the seat, outrigger and footrest separately. It also means that I can easily turn the whole lot around when I come to fit the forward rowing system. Jeremy |
|
|
In reply to this post by Paul H (admin)
It depends on how much rowing you propose to do. If your arrangement is comfortable, stick with it. A footplate will intrude into the cabin space and be a nuisance when you aren't rowing. Take a look at C-Cubz's ideas.
|
|
|
Yeah Paulie
'Illusion' is short enough and you already have that rear bulkhead. I suspect if you move very much further forward than it is already pushing you, you will find you have amply overcome the lack of ballast in the bow. In fact she'll be trimmed nose to the ground, like a bloodhound on the scent. What you are currently doing sounds pretty much the same as 'Octavia's forward rowing position, where my heels are on the hull and the balls of my feet on the bulkhead. It's fine but make sure you have some slightly substantial, comfy shoes (as you would wear for driving) otherwise the heels cop it and maybe even other bits too. Christo |
|
|
In reply to this post by Jeremy
A very brief update, as I've been "otherwise engaged" buying a building plot for our new house for the past few days (it's less than a mile from the river Wye, but I don't think SWMBO has spotted that feature, or realised its impact on my decision process..............).
I have been pondering over rowlocks, as I don't really like the look of conventional ones, so I bought a couple of sets of these from Australia: 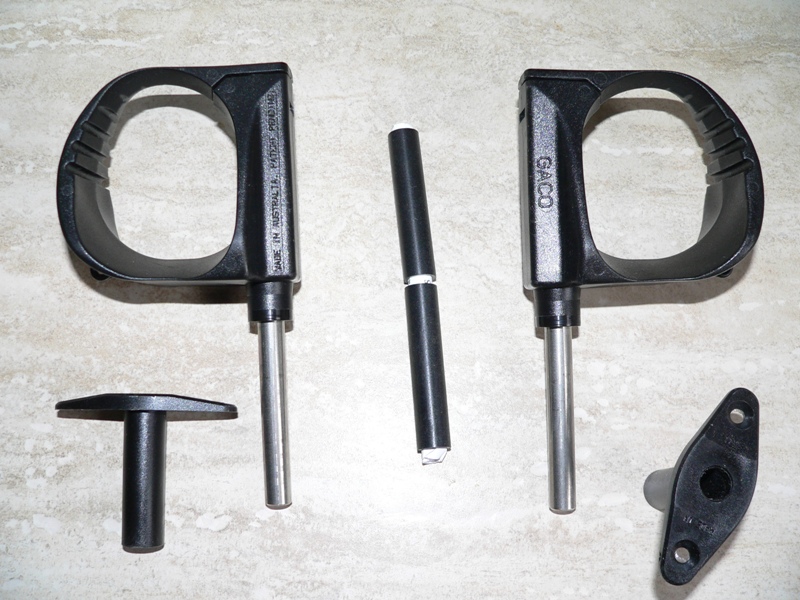 Apart from the hassle of having to buy them from the other side of the planet, I'm quite impressed with them. They fit the Delrin blocks I've mounted on the outrigger well and look as if they will do the job OK. There web site is here: http://www.gacooarlocks.com/oarlock.html I'm now in panic mode as I have to start work on the boat again tomorrow to get it finished. Finding a house build plot unexpectedly has thrown my schedule out the window (and massively increased my stress levels....) so some boat building therapy is in order for tomorrow. BTW, if anyone is interested, here's a photo taken from the centre of our new building plot, showing the view from the front: 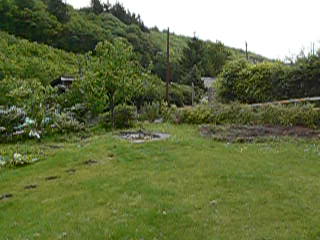 I now just need to persuade the planners that building the house of our dreams in the midst of an AONB will be OK. If anyone's curious as to the location, it's near Tintern, on the Wye, just inside Wales (by about 3/4 mile). As my wife is descended from Owain Glyndwr, albeit as the result of a strategic marriage between one of his daughters and the son of the then Lord Croft (a suppressor of the Welsh hordes), it's perhaps fitting that we'll end up in Wales. At least I'll get free prescriptions.............. Jeremy |
|
|
Jeremy, have you come across the Lammas website. They have taken account of new planning laws in Wales which allow eco builds even on farm land?
http://www.lammas.org.uk/ecovillage/documents/OnePlanetDevelopmentTAN6.pdf The planning permission phase took a long time but they did eventually succeed in taking advantage of the "One Planet Development" initiative. http://www.lammas.org.uk/ecovillage/documents/OnePlanetDevelopmentTAN6.pdf http://www.lammas.org.uk/ Very exciting to be planning your own new build. Brian |
|
|
Thanks for the links, Brian, looks interesting. The plot we've just bought has outline planning permission, after a long battle (it's about 0.37 of an acre, in the middle of an ancient wooded valley, with a stream flowing along the bottom, and is blessed with a lot of early post-medieval archaeology just below some of it). I want to build the lowest environmental and ecological impact building I can, so the build will be primarily timber, with small scale screw pile foundations (to minimise disturbance to the buried archaeology). With luck, there won't be more than the odd bucket load of concrete in the whole build. Heating will be (I hope) by a vertical bore ground source heat pump, feeding an underfloor system, supplemented by solar water heating. Non-drinking water will come from roof rainwater harvesting. Next stage is to get reserved matters approval, which means persuading the planners that the environmental aspects of the design outweigh their desire to keep the AONB as a museum of old stone cottages..............
Jeremy |
|
|
I got the first couple of coats of paint on today, what a palaver..........
The paint I've chosen is excellent in terms of flexibility and abrasion resistance, in fact it's quite remarkable stuff. However, it is a complete pig to apply. I started off trying to spray it and found that, despite the manufacturers claims, it simply won't spray with HVLP, no matter what you do to it. The viscosity was fine, but it just wouldn't atomise at all, which I think is something to do with the make-up of the paint itself. Having already discovered that it was hard to brush paint, without leaving brush marks, I tried a roller. This works OK, but the finish is pretty poor. The problem is that the stuff starts to cure very quickly, even though it's water based, so it's extremely hard to get rid of the roller stipple by rolling it out to a thin, even coat. The plan is to sand back the surface tomorrow evening, then try using a foam brush, to see if that will help. Jeremy |
|
|
This forward facing rowing video I think looks to be a similar mechanism to the one planned for Aerowherry.
I wondered how facing forward might feel, but it looks fine as he flies along. http://www.ez-row.com/video.htm or more like this one http://www.youtube.com/watch?v=ROIR0pkooIo&NR=1 Brian |
|
|
This post was updated on .
My forward rowing linkages do look pretty much like those, Brian, but I've tried to arrange the angles so that the oars are further forward at the catch, with the angular rate accelerating as the oar goes past the pin. Whether or not this will work and feel right I don't know. I won't have the forward rowing system finished for Beale Park, in fact I may not have any oars with me to fit the ordinary rowlocks that are currently fitted to the boat, as I've only had time to mould up one blade so far. I was going to buy a cheap set of 6ft 6" oars to do the raid and get on with the forward rowing system later, but with all the work on the new house build things have fallen a bit behind and I've had to pull out of the raid, unfortunately. I'll bring the rowing bits along to Beale Park and if anyone has a spare pair of oars around 6ft 6" long they can lend me for the weekend they can have a go in it. It's be nice to see how it rows.
I'm still struggling with this blasted paint. It really is the most awkward stuff to use. It's saving grace is that it is tough and water based, but it seems to have very little pigment and remains translucent even after a dozen coats. It's also very hard to get a decent finish, so I will apologise in advance for the rough finish. I have put another coat on the gunwales and decks this morning and may (weather permitting) get a final coat on later this afternoon. Being water based the over-coating time is quite long, which is another nuisance when I'm pushed for time before the weekend............. 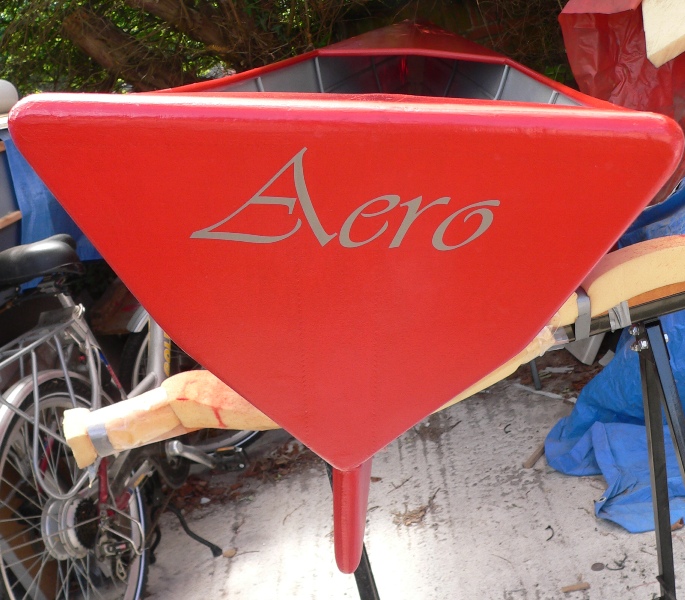 The good news is that the propulsion system for the cordless challenge seems to work well, I've managed to get a pretty big (12" diameter) home made prop to fit and still clear the hull. My predictions show that this prop will be around 85% efficient at hull speed, which is probably around 15% better than any commercially available prop. Whether or not it will propel the boat to hull speed and achieve that efficiency figure remains to be seen! Jeremy |
|
|
Bugger!*_!**!
Just after I took that picture, I moved the boat back out on to the drive to give the foredeck another coat of paint whilst the weather's looking cooperative. Having set it up on the padded trestles, I went into the workshop to get the paint, only to hear an ominous crash. The wind had blown the boat off the trestles, tipping one over in the process, the leg of which punched a neat triangular hole through the skin..................... Luckily, the tear is just below the gunwale, so I've just sanded the paint off and bonded a fabric patch on. The real nuisance is all the coats of paint I know I'm going to have to apply to the patched area to get it looking even half way decent again. Having to tie this boat down in anything other than a gentle breeze is a pain. Jeremy |
|
|
I've managed to patch the hole - can you spot where it was?
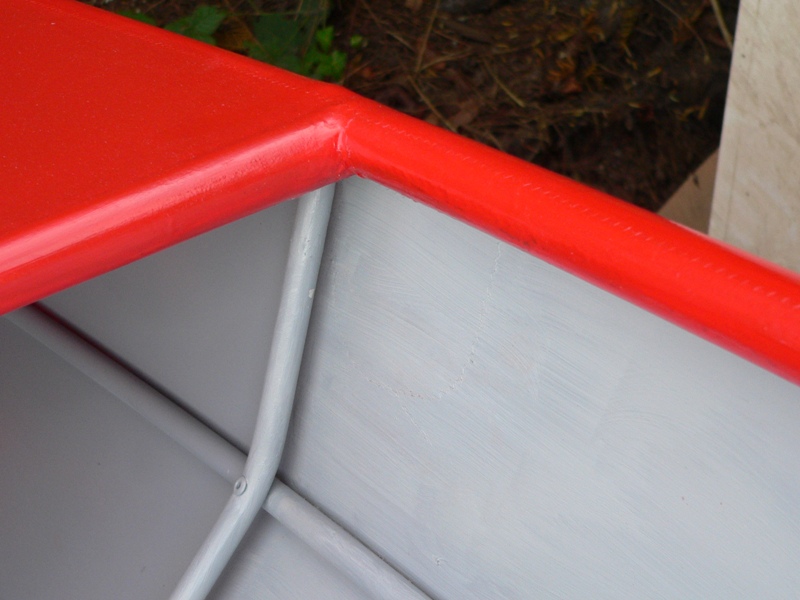 It isn't so hard to spot from the outside, yet, as it probably needs another few coats of this blasted paint. Here's Aero in Cordless Challenge Mode (ignore the string, it's tying the boat down to a weight.....): 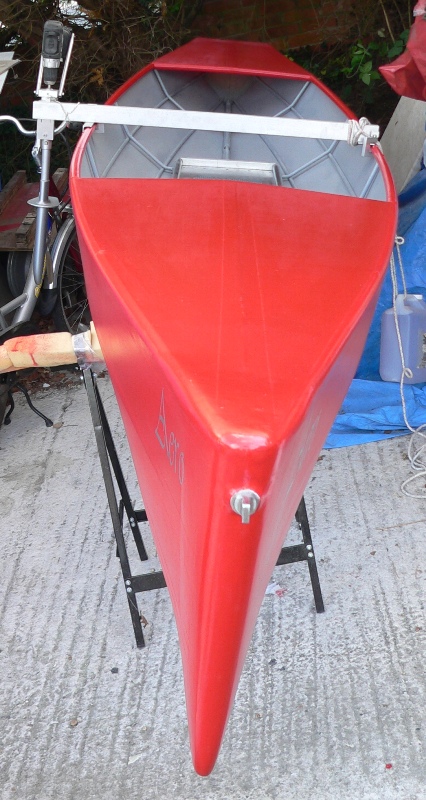 Here's a close up of the home made carbon fibre/epoxy/bronze prop and lower drive leg: 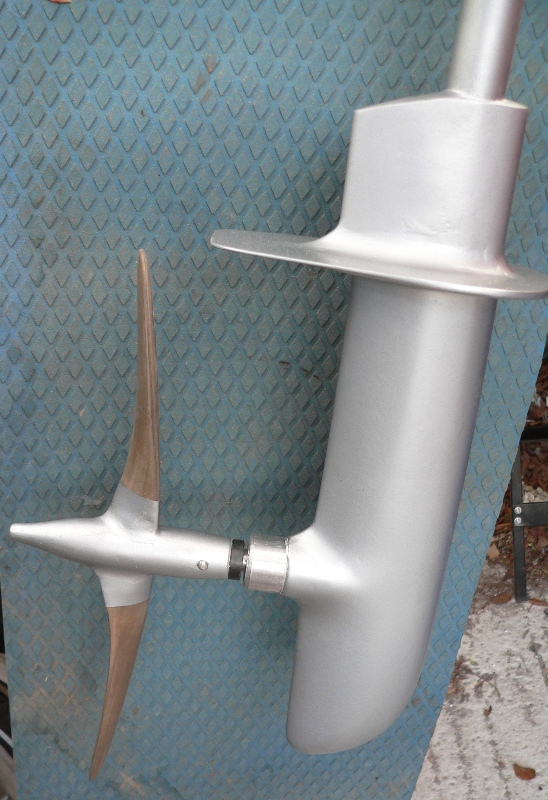 One of the drive unit tilted up like an outboard: 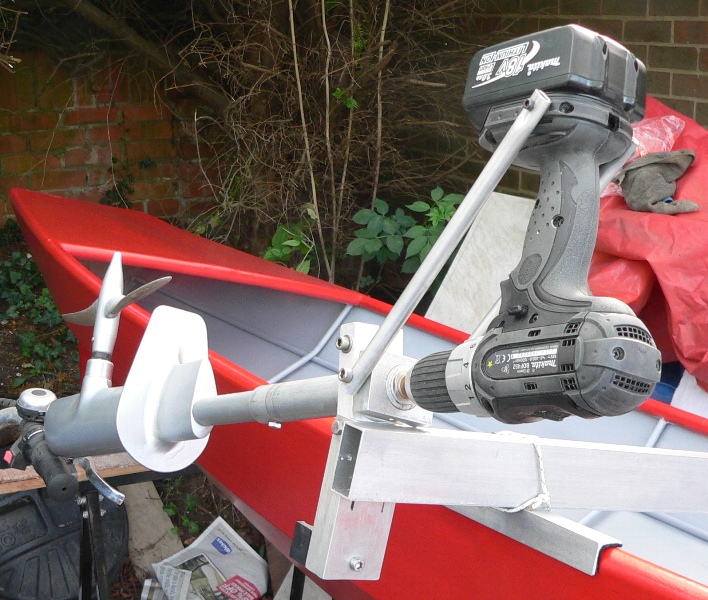 and finally one of the propulsion unit locked down but turned slightly: 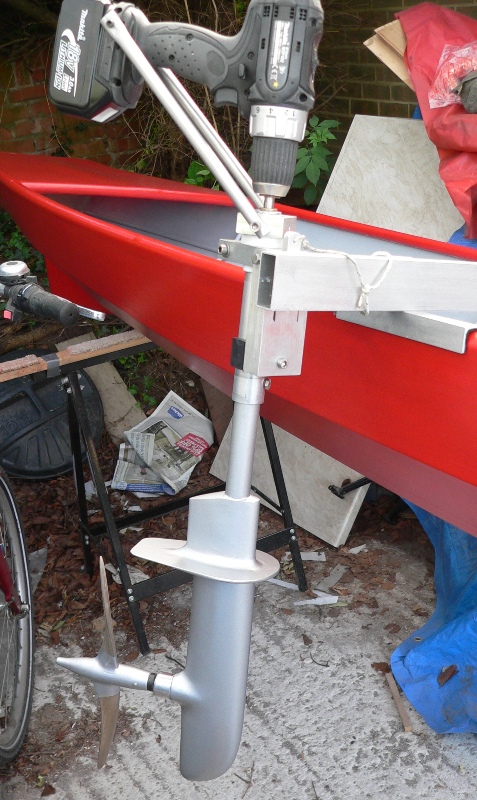 If the wind is cooperative I may take the boat out onto the drive again to try and get some better pictures, without all the clutter that clogs up my car port. Jeremy |
|
|
Commiserations Jeremy on your terrific effort for the Beale race being scuppered by a thoughtless spectator. After all that work it's a shame you could not enjoy competing and seeing how you went against what looks like some very fast boats.
How was Aerowherry? Did she float on her lines? Did you manage some rowing at all? She is so light I guess even getting in must need care. Are there any pictures of her on the water. If you plan any rowing trials you are very welcome down here at Keyhaven. I have some 7'10" oars and some nice 3m carbon sculls which would be great to try on her. Brian |
«
Return to Builds in Progress
|
1 view|%1 views
| Free forum by Nabble | Edit this page |

