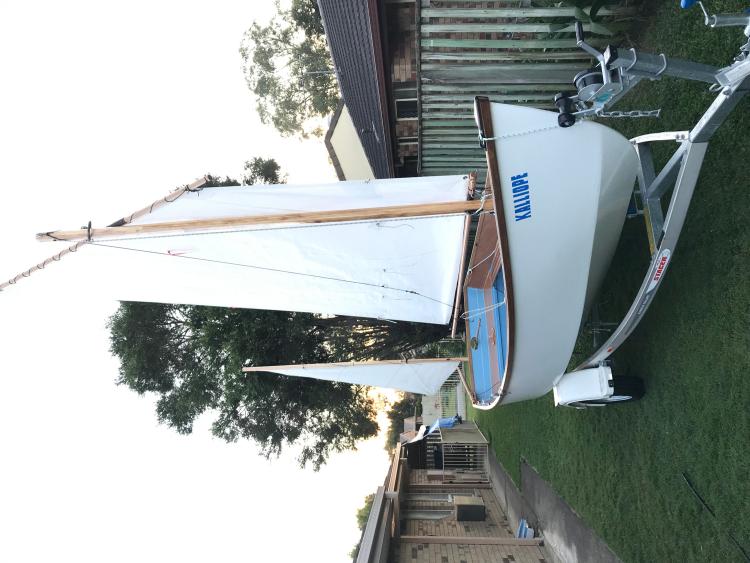
![]() |
Hi Jason,
Yes that's the idea, no point in varnishing the inaccessible areas which can't be seen properly. I have followed CW's lead and gone for an almost entirely painted interior on the Morbic. A further thought, I have used a non slip additive in the paint on the sole (no floorboards) and the tops of the side tanks, as gloss paint when wet can be slippery. I used a proprietary additive but I know others have used everything from sawdust to sand and even sprinkled the wet paint with rock salt then washed it off with hot water after the paint has dried. It can be embarrassing when you are creaming to windward, wind billowing through your hair and you lose your footing, go arse over tit and land in the bilges with your feet in the air. Don't ask me how I know this. G. |
![]() |
In reply to this post by Chris Waite
This is a tough one for me Chris, half the enjoyment is talking to people at the boat ramp ogling over my beautiful boat......
Maybe if I painted it some ghastly colour scheme I'd get more sailing time. Hmm....there's an idea. A sailing boat....for sailing.
|
![]() |
Polly Wee gets ogled too
For being weird Chris |
![]() |
Well boys and girls I'm back after another hiatus. Had to go up north for work.
I'm getting close to completion of the internal paintwork and I have to say I like where I'm going. I took the baby blue can of paint back to the shop and had a discussion with the owner. We settled on doubling the recipe which was right on the limit of the paint holding the tint but I'm much happier with the results. ![]() I took Graham's advice and cut some thin strips to go over the paint line on the side panels but had hell trouble trying to hold them in place while the epoxy cured so I'm not sure what to do there yet. The bare timber is epoxy coated in that photo and still awaiting the varnish. I want to make some timber cleats and fittings and fix them on before varnishing. ![]() ![]() There is a secret many of you might already know, but blue and orange are complementary colours. Google it and you'll see. The Okaume grain is a beautiful orange colour when clear coated and it might go a little darker with some varnish. That's why they contrast so much but go together so well. Centreboard goes in tomorrow. Theoretically I could put her in the water at this stage but I will resist a little longer. Jason |
![]() |
Small, Medium and Tremendous Jason!
You're so much faster than the average Pom, you'll probably have built a fleet by the end of the week Can't wait to see the photos of the launch.... Chris |
![]() |
Whilst waiting on the varnish curing issue.....still waiting.....more on that over in general discussion....
I decided to mount the rudder and the mizzen mast. Plus I put a cleat to tie the centreboard in the up position. I'm using the CW squished PVC tube idea to hold the centreboard in the down position. ![]() ![]() The mast step is bolted through the transom with blocks of solid timber on the inside of the transom for strength. Holes through the transom were countersunk so they'd take up heaps of Sika marine sealant around the bolts. A stainless U bolt through the gunwale holds the mast vertical. I think I even managed to get it straight. Jason |
![]() |
Oh man.....I need to get this boat finished. Sailing season is upon me.
![]() |
![]() |
![]() ![]() ![]() Centreboard - check Rudder uphaul and downhaul - check Huntingford helm impeder - check Balanced lug downhaul and mainsheet - check Mizzen mast and leg o mutton rigging - check If only I could finish the varnishing I could go sailing. To-do list: -Mizzen sail sheet - still not sure how to do that bit ( I might need a backwards bowsprit) -Oar locks - waiting on the final varnish -Anchor fairleads - after varnish -Electric outboard mount -Seat tank lid rubber seals - after varnish So so close now. JM |
![]() |
You will need a backwards bowsprit Jason
It's called a bumkin, though you can use 'oo's instead, or a 'p' in it as well, if you're feeling profligate. Probably easiest to bring the end to the midline from an angle so that it can be braced across one of the quarters, or through a port in the transom and fixed to the sternsheets. If the inboard end is not tucked off-centre it can get in the way. It is a problem with a mizzen - it all starts to get rather complicated Chris |
![]() |
Ah yes I built my bumkin....and finished off the other jobs.
Splash day was yesterday. All went well. Except my champagne cork spontaneously erupted and spoiled my big speech.... ![]() ![]() ![]() https://www.youtube.com/watch?v=auN6qEBQV14 So that more or less rules a line under this build thread. I'm sure I will be revisiting this thread to ask questions about the endless tweaks and adjustments that lie ahead. Thank you to everyone who contributed thoughts and ideas and consoled me when things went wrong! Jason |
![]() |
Just on four months 'From Notion to Ocean', Jason
Not bad at all! Please do not credit me with so many of the little tricks I have passed on to you. While one or two are actually mine, the rest have been gleaned by hook and crook from a life of boat furtling - the squished PVC centreboard friction device, for instance, is one I plagiarized earlier. Having said that, here's one I do profess to; other boats do show signs, but I worked this out from my own experience of soggy bottoms. The water slopping over the aft end of the centreboard case is a pain in the proverbials, or at least an unpleasantly frigid sensation that won't go away. The salt can also itch like hell. This is probably going to have to wait for your next build, but if you rake the aft end of the case forward a tad, then it tends to drive the water back down where it belongs. The other trick to this, is to cover the aft end of the case; this creates it's own problems as the centreboard is probably 'wider' than the case is deep, so it needs to rise proud of the case when fully rectracted. Well bother The answer to this is to have a (longer), narrower board and/or raise your (?entire) seating plan to allow for a deeper case. This juggling act provides for you to sit on the thwart for sailing to windward in light weather and rowing. Only you can decide how much importance to attach to each parameter. 
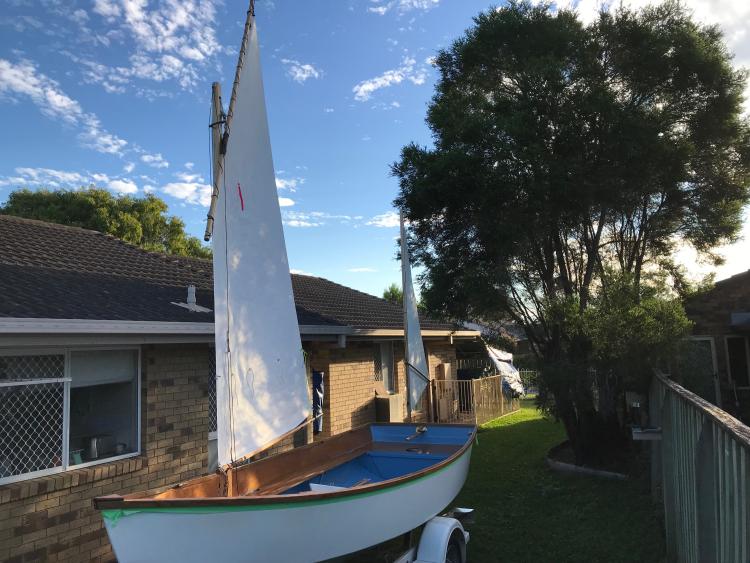
Here really is one I made earlier - ![]() ![]() 
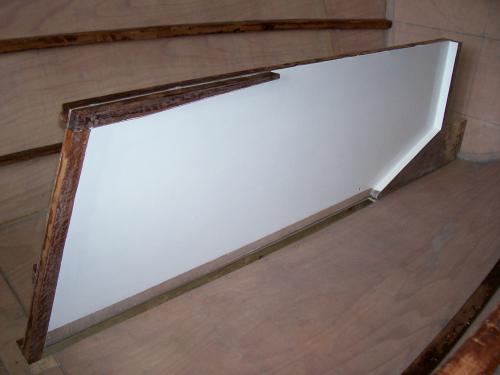
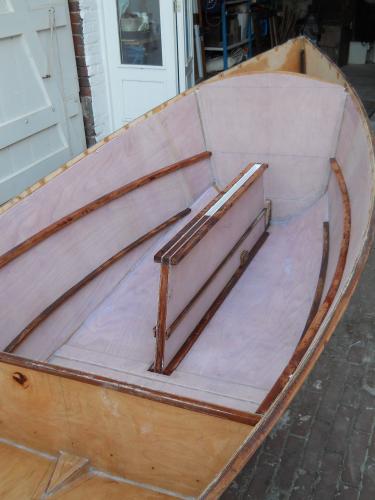
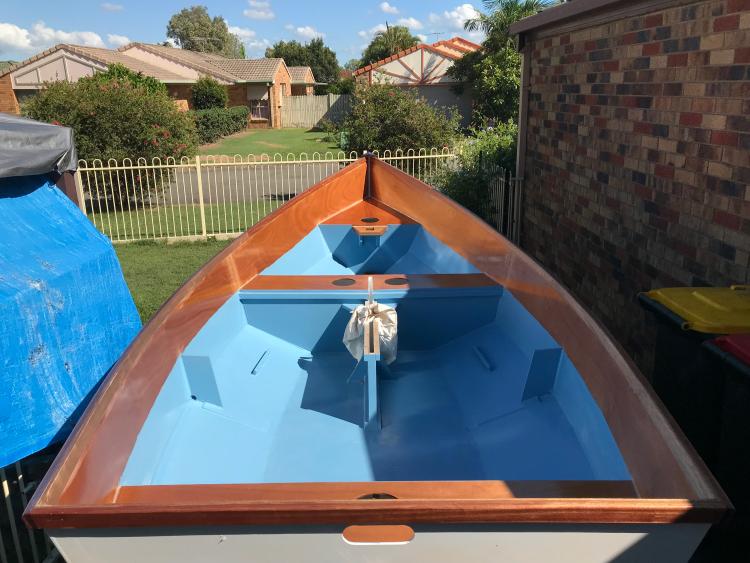
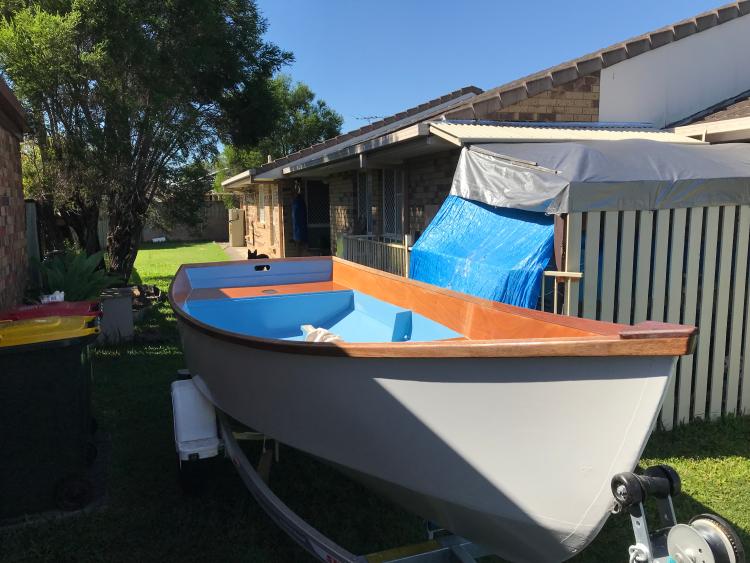
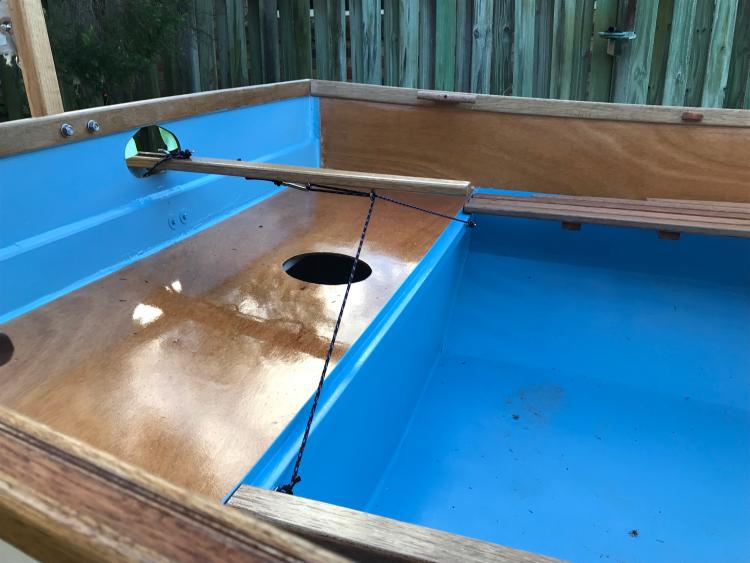
This is one half of the case standing in the hull, showing the 'raked' aft end and the integral 'cap' on the left of the image; the second image shows the case in place. Now, I've made it easier for myself by building an alarmingly deep hull, then fencing (?flooring) off the lower six inches to take water ballast. Half a sheet of 4' x 8' ply, divided lengthways, is eighteen inches for me and six inches for the ballast. Then a nice wide thwart (16") goes over the top of the splash-proofing cover - dry bottoms for me and the bilges. The arrangement does have a certain frequency in light weather that produces a repetitive glop-glop-glop, but I'll take that over the consequences. 
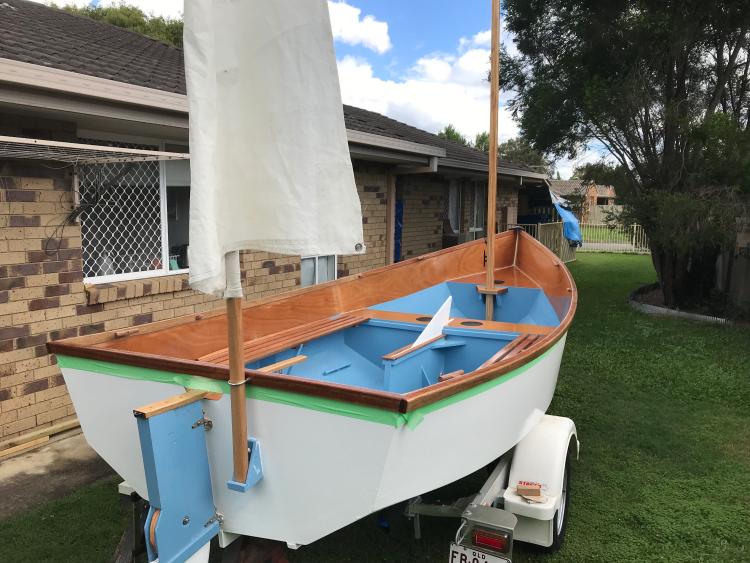
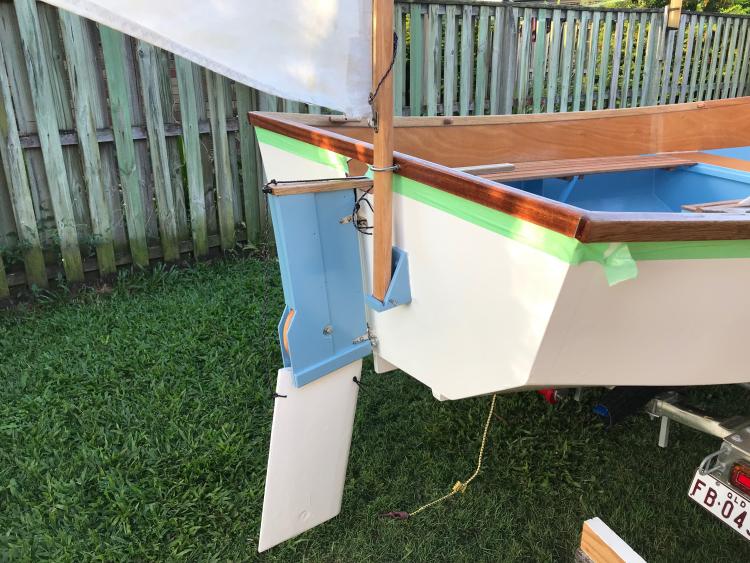
Again, here's one I made earlier; this is the keel with the stem, centreplate case and skeg for Tit Willow, the pocket cruiser - ![]() ![]() 
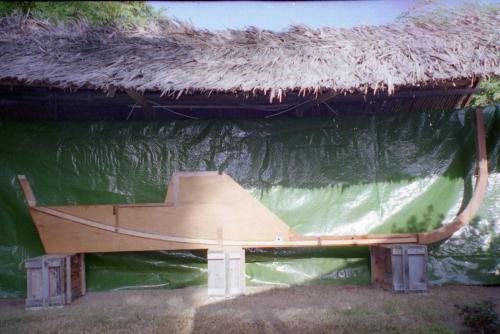
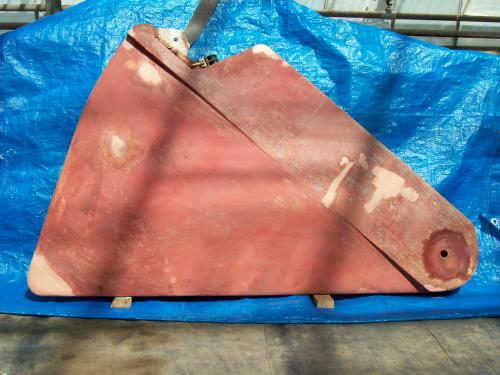
The case is the central truncated pyramid where thwart level is at the truncation, the cockpit sole is half way down (aft) and the aft edge continues a raked progression though the depth of the skeg. The second image shows the sharks-fin shaped plate itself. Don't tell me "There won't be a next time!" I simply don't believe you Chris |
![]() |
Ah yes well I am not fool enough to say "there won't be a next time". I'm going to a classic boat regatta next weekend.....I am bound to see something there I like.....
The Argie does have a slight rake at the back of the CB case but apparently it is a design issue as I have seen other commentary on it. But of course I told myself "not my Argie"... For a temporary measure I have built a little T shaped length of ply with soft foam rubber that sits on the top of the case to "seal it" Sort of like this sketch below. It can go in the gap when the board is down. If that works I'll hinge it so it pops up when the board comes up (yes the board sticks out the top when retracted). Then I'll think of a more glamorous solution. One other Argie owner made a flexible seal that allows the board to push up into it but then falls away into the case when the board goes down. I like your idea and Paul's better (permanent lid). ![]() |
![]() |
The supreme benifit of a fixed cover at deck level, is your phone won't end up in Davy Jones's locker.
There is a Samsung S8 100m North of East Head, 6m down at the edge of the channel (it may need recharging). Paul |
![]() |
‘Twas the fear of exactly that happening that recently drove me to invest in this:
![]() |
![]() |
I'm definitely going with a permanent cover over the CB case. Even with my little T piece sitting in there, the water managed to get out....
I've seen another argie over here put a flexible piece of material up and over the slot so the CB can cozy up into it when it is up. I might get more creative and build something wooden that I can use as a table, with fold up sides......oh I don't know, let's wait till I get out in the yard and stare at it a bit more. Jason |
![]() |
Oh by the way, I ran around on a sand bank at the Regatta on the weekend and lo and behold, the squishy bit of PVC pipe that gives the CB some "grip" inside the case graciously let the board fold up and we continued on unharmed. Didn't even dint the CB.
Nice idea CW! |
![]() |
In reply to this post by Jason Mayer
Jason,
For a table I rest a washboard on the CB case just inside the cabin. Two horizontal cleats each side of the bulkhead provide extra support. If it's windy I fit the lower washboard in place; then the gas burner is completely protected. You could fit a single sleeping board over the CB case; the thwart might support it. Paul |
![]() |
For those electrically minded here is my electrical arrangement for the electric outboard, battery and charging facilities.
It is all nice and secure in the aft flotation tank which I am now confident is watertight. A battery in the back end is not perfect but it's only 6kg and I don't have to run wires too far. Here is a rather meaningless photo showing some switches, a voltmeter, a PV battery charger and power meter. ![]() Here is the more meaningful schematic diagram. ![]() Whilst a PWM motor controller upstream of the Forward/Reverse switch would be ideal, it's an electronic gizmo that I don't want to trust until I can pot one in resin to keep it away from the elements. The motor has internal speed coils that I presume drops the voltage and/or limits the current drawn by the motor. It draws less than half the current and runs somewhat slower (I'll have to test with a GPS speedometer to estimate the power difference and see how bad the efficiency is on low speed). Jason |
![]() |
To clarify....
The motor is mounted on the back with a small plug and about 6inches of wire hanging out. The controls and battery are mounted in the aft tank with about 3 feet of wire and matching plug. To operate the motor I simply open the aft hatch cover, pull out the wire and plug it into the motor. Hit the ON switch and whatever other control I want (Forward, Reverse, Fast, Slow etc). Then just motor away. When I'm done just pack it back in the tank and close it up. The motor can be raised and lowered by a simple bracket to that it doesn't drag when I'm not using it. Jason |
![]() |
In reply to this post by Jason Mayer
Jason,
The cheap trolling outboards have resistors in series with the motor to drop the voltage, which waste power as heat. Stick a multimeter set to Ohms across the motor and take measurements at each speed. Then the speed resistors and their effect can be estimated. Btw How is the battery held down? Paul |
Free forum by Nabble | Edit this page |